
GENRE: Point & Click Adventure
WHERE TO GET IT: GOG
============================================================
PART 1
NEW YORK
============================================================
~~~~~~~~~~~~~~~~~~~~~~~~~~~~~~~~~~~~~~
NEW YORK BAIL BONDS BUILDING
~~~~~~~~~~~~~~~~~~~~~~~~~~~~~~~~~~~~~~
YOUR OFFICE
After the intro, you find yourself
trapped in your office, with your new client, Anna Marie.
After your last adventure, you’ve now
settled down, and run a Bail Bonds agency in New York. Anna Marie was waiting for you in your
office, and she asked for your help. She
mentioned a manuscript. Then a couple of
thugs appeared, and begin shooting the place up, leaving you and Anna Marie
trapped in your office. You have to find
a way out of here.
Look at the GOLF CLUB in the
corner on the right, and pick up the GOLF CLUB. Walk left a few steps. Look at the hi fi on the floor against the
wall. Look at the door in the back wall,
and use your GOLF CLUB to break through the door.
FILING ROOM
Look at the filing cabinet to the left
of the door. Push it over, to block the
door and stop the gangsters getting in.
Climb up onto the filing cabinet, then jump up through the hole in the
ceiling. Anna Marie follows you.
FLOOR ABOVE YOUR OFFICE
Watch the cut scene, as Anna Marie tells
you a bit more about her manuscript. The
lift starts moving. The thugs are trying
to find you, and you have to stop them.
Anna Marie instinctively holds to lift door open, so the thugs can’t get
here, but she can’t hold it open forever.
You need to help her out. Use
your GOLF CLUB with the space under the lift door, to prop it open.
Explore the room, and find the grille
covering the extractor fan in the top right corner. Try to pull it off, but you can’t. From your Inventory, use ANNA MARIE’S ICON
with the grille. She helps you to
pull the grille off the wall. Look at
the extractor fan to see that the wall around it is crumbling away. Pull the extractor fan out from the
wall. Now move the extractor fan over to
the lift. Click the right mouse button
to grip \ release the extractor fan.
Move the extractor fan into the gap underneath the lift door. Now the lift isn’t going anywhere. Retrieve your GOLF CLUB from the gap
under the lift door.
Go back to the hole at the top right,
and climb in there.
LEDGE OUTSIDE THE BUILDING
Click on the area on the right to hug
the wall, then inch right along the narrow ledge, until you reach the fire
escape ladder. Click the right mouse
button to step away from the wall, then click on the ladder to climb up to the
roof. Step up onto the roof.
ROOFS
On the roof, walk right a few steps, to
the ladder in the middle of the roof.
Climb up the ladder, onto the platform.
Walk along the platform, and click on the right edge of the platform to
release the chain. Look at the chain
that’s now hanging below the platform, and try to grab the chain, but it’s out
of reach. Use your GOLF CLUB with
the chain below the platform, to grab it.
Watch the cut scene, as you swing across to the roof of the next
building.
You have to find a way to get Anna Marie
onto this roof. Walk back a few steps,
and look at both handles behind the pillar.
They are used to rotate the loading joist. The handle on the left is broken, so just
ignore it. Use the handle on the right
to rotate the joist. Watch the cut scene
as Anna Marie crosses over the joist, and joins you.
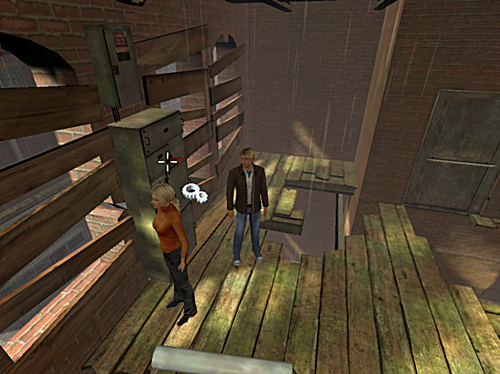
WAREHOUSE
Watch the cut scene, as you make your
way into the warehouse. Walk left a few
steps. Click on the area on the wall,
above the planks, to jump up and grab onto the ledge. Shimmy left a bit. Grab the pipe above you, on your left - it
will break loose. Shimmy left again,
until you reach the next ledge. Click on
the floor to drop down onto the floor.
Walk left, to a gap in the floor. Click on the floor on the left, to jump over
the gap. Walk left, to the wall. Click on the wall to hug it. Now inch left, over the narrow ledge, until
you reach the next part of the floor.
Step away from the wall. Walk
through the hole in the wall.
There is an opened door here - walk up,
through the door.
From this angle, outside the building,
you can see that the door is tied open.
Take the STRING that’s keeping the door open, then enter the
building again.
Close the door, and slide the door bolt
across, to keep it locked. Right click
on the door, and select the Gear Icon.
You kick the door down, causing it to fall over, and create a bridge for
Anna Marie.
If you’re outside the building, go back
inside. Climb down the stairs, all the
way down to the Ground Floor. Try to
open the door on the right, but something is blocking it from the other
side. Looks like you’ll need to find
another way out of here. Climb up 1
level, to the 1st Floor. Head
out through the doorway.
Walk left, over the floorboards, to the
end of the room. Look at the rusted pipe
on the floor, on the left side of the room.
Look at the nearby breaker switch, on the wall on the left.
Try to use the breaker switch, but it
keeps flipping back to the ‘ON’ position.
Work your way back along the broken floorboards, past the door you came
from, then head right, and go down the slope.
You’ll see a wooden beam in front of you.

Click on the plank in front of you, or
click on the floor beneath you. You’ll
lower yourself down, so you are hanging on the edge of the floor. Drop down to the floor below. Walk right a few steps, then walk over the
planks, until you see the live electric cables.
Click on the cables, to hear the story about Granny Stobbart. Better keep away from them!
Head left, and make your way back to
where Anna Marie is waiting. Click on
the overhanging floorboards, and pull yourself up onto the floor.
Head left, and work your way back across
the floorboards, back to the rusty pipe and the breaker switch. Use ANNA MARIE’S ICON from your
Inventory, with the breaker switch (this won’t work, unless you’ve seen the
live cables below). She holds down the
breaker switch for you.
Head right, and work your way across the
room, back to the live cables. Now that
Anna Marie is holding down the breaker switch, the cables are no longer
live. Continue past the cables, and
right over the floorboards, until you see a large crate sitting in front of a
door. Click on the crate to move
it. You automatically open the door,
allowing Anna Marie to re-join you.
Walk right, to the security
shutters. Try to lift the security
shutters, but you’re not strong enough.
Use ANNA MARIE’S ICON from your Inventory - she’ll try to lift
the security shutters, but she can’t do it either. Use the handle to the right of the security
shutters, to wind them up. It works. However, if you let go of the handle, the
security shutters just fall back down again.
Okay, use ANNA MARIE’S ICON with the handle to the right of the
security shutters, so she winds the shutters open. Now click on the security shutters to hold
them open, while Anna Marie climbs through.
Watch the cut scene, as you and Anna
Marie escape to her hotel.
~~~~~~~~~~~~~~~~~~~~~~~~~~~~~~~~~~~~~~
HOTEL ALFONSO
~~~~~~~~~~~~~~~~~~~~~~~~~~~~~~~~~~~~~~
LOBBY
Well, you may have escaped the goons at
your Bail Bonds office… but you’re not out of the woods yet. As you enter the Lobby, Anna Marie recognises
another of the goons. To top is off,
she’s lost her handbag, which contained the key to her hotel room - Room
23. So you have to find a way into her
room, while she hides in the alley outside.
Try to use the phone booths in the back
wall - oops, they’re for paying customers only.
Talk to Alfonso, behind the Reception Desk, and work through all the
conversation topics. Alfonso gives you a
NEW YORK HOTEL FLYER. Look at NEW
YORK HOTEL FLYER in your Inventory, to get the hotel’s phone number. Look at the LIGHTER behind the glass
partition. Talk to Alfonso again, and
ask about the lighter, to learn that that‘s all he has left to remind him of
his father. Walk left a few steps, Look at the grandfather clock, and try to use
the grandfather clock. Alfonso warns you
not to touch it. Try to use the water
cooler machine on the left, but it’s out of order. Walk left a few more steps, and look at the
security door. Try to open the door -
it’s locked, and you need a security key card to get through it. Walk right, to the Lounge Area.
LOUNGE AREA
There’s a man, Thelwell Minster, reading
a book in this area. Talk to him, and
work through all the conversation topics.
You learn that he’s here to buy some paintings of geese. Examine his book, to learn that there is a KEY
CARD tucked in between the pages of the book. Try to take the KEY CARD, but you only
end up upsetting the man. Look at the
cigarette dispenser on the right, and try to use it, to learn that it’s out of
order. Look at the drinks vending
machine on the right, and try to use it, to learn that it’s out of order. Open the door on the right, and head through,
into the bathroom.
BATHROOM
Use your PDA from your Inventory,
and select the following options.
- Phone
- Alfonso’s Hotel.
When Alfonso answers, work through the
conversation topics. You trick Alfonso
into telling Thelwell that there’s a phone call for him. When Thelwell goes to take his (non existent) call, leave
the bathroom.
LOUNGE AREA
Thelwell has left his book on the table,
while he goes to take his call. Quickly,
pick up the book to get the HOTEL KEY CARD. You don’t have much time before Thelwell
returns. Now go left, back to the
Lobby.
LOBBY
Walk left to the security door. Look at the electronic card reader next to
the security door. Use HOTEL KEY CARD
with the electronic card reader to unlock the security door, then walk
through the door to the stairwell.
STAIRWELL
Climb up the stairs to the 1st
Floor.
1ST FLOOR
You get a phone call from Anna
Maria. She’s trapped on the fire escape, and it’s only a
matter of time before the goons find her.
She asks you to get into her room, and open the bathroom window for
her. Look at the yellow ‘Fumigation
Warning’ sign that’s on the stairs leading up. Look at the pile of dead bugs on the stairs,
and pick up a DEATH WATCH BEETLE.
Yuck!
Go left, into the corridor with all the
hotel rooms. You hear banging coming
from the cleaner’s cupboard (1st door on the left), but a goon warns
you to just ignore it. Try to open the
cleaner’s cupboard, but again, you are warned away from there.
Walk up along the corridor. Look at the flower vase on the table on the
right, to see that the flowers are completely dry. Try to enter the last room on the right -
Anna Maria’s room, but the goon guarding the room stops you. Look at the sprinklers on the ceiling - they
could sprinkle out a lot of water! Walk
up to the window at the end of the corridor.
Look at the window - it looks out over
the front of the building. Open the
window. The goon isn’t happy about it,
but you open it anyway. Walk down the
corridor, and go back to the stairwell.
Climb down the stairs to the Ground
Floor.
Use HOTEL KEY CARD with the
electronic card reader next to the door.
Head through the door, back into the Lobby.
LOBBY
Go to the Reception Desk, talk to
Alfonso, and work through all the conversation topics. Walk left to the Grandfather clock. Use the DEATH WATCH BEETLE with the
Grandfather clock. Talk to Alfonso again
and tell him about the beetle. Alfonso
rushes over to inspect his beloved Grandfather clock. While he is away, quickly open the glass
hatch on the right, and take the LIGHTER from the Reception desk. Now walk left to the security door.
Use HOTEL KEY CARD with the
electronic card reader to unlock the security door, then walk through the door
to the stairwell.
STAIRWELL
Climb up the stairs to the 1st
Floor.
1ST FLOOR
Go into the corridor on the left, with
all the hotel rooms.
Walk up to the window. Wait until the goon is doing his Elvis-dance,
then open the window again. Now walk
down to the dry plant on the table. The
goon goes to close the window. Seize
this opportunity. While he has his back
to you, use the LIGHTER with the dry plant to start a fire, thus
activating the sprinkler system. The
goon runs for cover. Open the last door
on the right, and enter Room 23.
ROOM 23 - ANNA MARIA’S ROOM
The room has been ransacked! Look at the safe next to the window, to
realise that it’s empty. They’ve taken
Anna Maria’s manuscript. Walk down a few
steps, and pick up PEN FROM HOTEL ROOM from the floor. Make your way into the bathroom on the
left.
Look at the extractor fan in the panel
at the end of the bathroom. Look at the
control switch in the panel, and use the control switch to turn off the
extractor fan. Tie STRING to the
extractor fan, then use the control switch again to turn the extractor fan back
on. Watch the cut scene with Anna
Maria. Talk to Anna Maria and work
through the conversation topics. There’s
nothing else you can do here, so leave the room.
1ST FLOOR
Walk down a few steps, and look at the
cleaner’s cupboard again - the 1st door on the left. But the goon, who’s watching from the lift,
tells you to stay away from the door.
Look at the numeric keypad next to the door. Pity you don’t know the code for this. Use the NEW YORK HOTEL FLYER with the
cleaner’s cupboard door. Use PEN FROM
HOTEL ROOM with the cleaner’s cupboard door. You hear shuffling from behind the door, then
the NEW YORK HOTEL FLYER and the PEN FROM HOTEL ROOM both appear
on the floor again. Pick both items
up. There’s a number scribbled on the NEW
YORK HOTEL FLYER - 5837X. Use the
numeric keypad next to the cleaner’s cupboard door. You open the door, and find the missing
Receptionist, who’s not very happy about being locked up in the cupboard. Who can blame her? You automatically return to your office.
~~~~~~~~~~~~~~~~~~~~~~~~~~~~~~~~~~~~~~
NEW YORK BAIL BONDS BUILDING
~~~~~~~~~~~~~~~~~~~~~~~~~~~~~~~~~~~~~~
RECEPTION AREA
Watch the cut scene with poor
Virgil. Your building has been
ransacked! Talk to Virgil - he’s fuming
that his music player has been smashed, so he’s lost all his music. Head up, into your office.
YOUR OFFICE
Walk up a few steps, and look at the ITALIAN
CIGARETTES on the top edge of your desk.
Strange. Nobody in your office
smokes. Take the ITALIAN CIGARETTES. Walk down, and leave your office.
RECEPTION AREA
Click on the door on the right, opposite
Virgil, to leave the building.
MAP
Go back to Hotel Alfonso.
~~~~~~~~~~~~~~~~~~~~~~~~~~~~~~~~~~~~~~
HOTEL ALFONSO
~~~~~~~~~~~~~~~~~~~~~~~~~~~~~~~~~~~~~~
LOBBY
You’re greeted by the Receptionist you
saved, and a policeman. Talk to the
Receptionist, Juanita, and work through all the conversation topics. Talk to the policeman and work through all
the conversation topics. Show the ITALIAN
CIGARETTES to the policeman. Talk to
the policeman again and work through the conversation topics. Talk to Alfonso and work through all the
conversation topics. Head right, and
leave the hotel.
MAP
Go to Mama Martino’s Meat Packing.
~~~~~~~~~~~~~~~~~~~~~~~~~~~~~~~~~~~~~~
MAMA MARTINO’S MEAT PACKING
~~~~~~~~~~~~~~~~~~~~~~~~~~~~~~~~~~~~~~
GROUNDS
Enter the small Salami Shop at the
back.
SALAMI SHOP
Look at Chico Garella behind the
counter. Look at the bloody apron
hanging up on the wall behind the counter.
Talk to Chico and work through all the conversation topics. You realise that he’s desperate for a
cigarette, so give him the ITALIAN CIGARETTES you found in your
office. When prompted, choose the SALAMI
as trade. Now leave the shop.
GROUNDS
Stand next to the wall, below the wooden
pallets, so you can still see Chico through the window. Wait for a few moments. When you see Chico leave through the blue
door at the back of the shop (he’s going out for a smoke), quickly enter the
Salami Shop again.
SALAMI SHOP
Quickly take the bloody apron from
behind the counter, then leave the shop.
GROUNDS
You automatically wear the apron. This lets you blend in, so you can explore
the premises freely. Walk down to the
bottom of the grounds, then head up the ramp on the left. Try to open the metal shutter for the loading
bay, but it’s locked. Continue along the
ramp, until you see the guard. Talk to
the guard and work through the conversation topics. Walk down, and enter the refrigerated
truck.
In the truck, look at the pile of ice in
the corner. It’s beginning to melt. Take some ICE FROM FREEZER TRUCK, then
leave the truck again.
Walk up, into the Factory.
FACTORY
Have a look around the factory if you
like. Notice the pigs hanging from the
line above. When you’re ready, head up
through the door in the back wall.
CONVEYOR BELT AREA
Make your way to the top-right corner of
the room, opposite the conveyor belt.
Look at the FIRE PROOF BLANKET that’s hanging on the wall, and
take the FIRE PROOF BLANKET. Now
walk left a few steps, and up through the door.
DUMPSTER AREA
Ignore that blue door for the
moment. Walk left a few steps, and look
at the bone crunching machine. A bunch
of safety keys are hanging from the key slot, so take MACHINE SAFETY KEYS from
the machine. Walk up a few steps.
You hear music coming from
somewhere. When you look up, you see
that it‘s coming from an air vent high up in the wall. Look at the forklift truck on the left, and
try to use it - it’s dead. Look at the
green meat waste bin on the right. Push
the green meat waste bin left a few times, until it’s on the forks of the
forklift truck. Insert MACHINE SAFETY
KEYS into the forklift truck, then use the forklift truck to raise the
green meat waste bin up. Adjust your
position, so you can see the green meat waste bin. Climb up it a few times, until you reach the
air vent. Look at the air vent in the
wall. Use the air vent, and watch the
cut scene with the thugs. They have Anna
Maria’s manuscript. Climb down again, so
you are back on the ground.
Head up, and make your way past the bone
crunching machine, through the door opposite, and back to the conveyor belt
area.
CONVEYOR BELT AREA
Head down to the bottom left corner, and
go through the door at the top of the stairs on the left.
FACTORY
Head to the bottom-left corner of the
room. If you looked here before, the
shutter with the green light above it was locked. Now, the shutter is open. Head up, through the shutter, into the Log
Room.
LOG ROOM
Explore the room. Try to open the large metal door to the left
of the pile of logs. OUCH!!! That door is HOT!!! Use your FIRE PROOF BLANKET with the
door, to open it. Now head through the
door, into the Smoking Room.
SMOKING ROOM
Look at the meat hanging from the
ceiling. Touch the meat to realise it’s
very greasy. Look at the collection of
logs that are smouldering in the tray on the floor below the meat. Use the FIRE PROOF BLANKET with the
smouldering log to pick it up, so you now have FIRE BLANKET HOLDING
SMOULDERING WOOD. Now you just have
to put that log to good use. Leave the
room.
LOG ROOM
Walk down a few steps, and climb up the
wooden stairs. Walk along the platform,
and enter through shutter, back into the main factory area.
FACTORY
Head right, until you see the pigs
hanging up. Walk through the door on the
right, where the guard is standing.
GROUNDS
SAVE YOUR GAME HERE. Go into the
refrigerated truck again. Pick up ICE
FROM FREEZER TRUCK from the bottom corner.
Now you’re gonna have to be quick here, before the ice melts, so use
Left Ctrl to Run. Run out of the
truck.
Run up through the door next to the
guard.
FACTORY
Run up through the door in the back
wall.
CONVEYOR BELT AREA
Climb down the stairs. Run right a few steps, and head through the
door at the end.
DUMPSTER AREA
Ignore that blue door. Run forward, past the bone crunching machine,
and onto the area with the forklift truck.
Run left to the forklift truck. Climb up it, and climb onto the green bin,
until you reach the air vent. Push FIRE
BLANKET HOLDING SMOULDERING WOOD through the air vent, into Fingers
office. Only a small amount of smoking
is going into the office, so you need to make more smoke. Use ICE FROM FREEZER TRUCK with the
air vent. If your ice has melted, simply
go back and get some more. Now watch the
cut scene as Fingers and his gang of thugs leave the office. This is your chance to get the MANUSCRIPT.
You find yourself back at the door. Walk up, through the door, into the area with
the conveyor belt.
CONVEYOR BELT AREA
Walk down a few steps. Climb up the stairs on the left, and go left,
info the factory.
FACTORY
Walk down a few steps, and left a few
steps, so you can see the Control Panel on the wall, next to the pigs hanging
up.

Use the Control Panel to rotate the
conveyor belt. Watch the cut scene as
you see Tony… hanging from a meat hook.
Eek! Poor Tony! Look at Tony, and search Tony, to find a MEAT
PACKING COMPANY KEY CARD. Go back up
through the door at the top right corner of the room.
CONVEYOR BELT AREA
Climb down the stairs. Walk forward, and go through the door at the
end.
DUMPSTER AREA
Look at the blue door in the corner, and
go through the blue door.
STORAGE ROOM
Look at the First Aid Kit on the
wall. It’s good to see that the factory
is so safety-conscious. Open the First
Aid Kit. Wait a minute… this isn’t a
First Aid Kit at all. It’s a Security
Card Reader. Use the MEAT PACKING
COMPANY KEY CARD with the Security Card Reader. Ah-Ha!
A secret doorway! You
automatically go through the secret doorway.
SECRET ROOM
It’s very dark here. Climb up the stairs to the top, then go
through the door on the left, into the office.
OFFICE
This is the room you saw from the air
vent outside. Look through the shaded
window, and look through the opened window on the right 2 times, so you see the
bone cruncher below. Walk over to the
desk, and try to open the drawers on each side of the desk. Unfortunately, the drawers are locked. Open the drawer in the middle of the desk to
find SOMETHING WRAPPED IN SILK HANKIE.
Examine SOMETHING WRAPPED IN SILK HANKIE in your Inventory to
discover PHOTOGRAPH OF FILM STAR LUCY CHU, and the SILK HANKIE. Look at the metal filing cabinet that’s
against the wall - this is where Anna Maria’s MANUSCRIPT is kept. Try to open it. You’ve never seen so many locks! How are you going to open it? Right-click on the filing cabinet, and try to
push the filing cabinet - it won’t budge, because the wheels are rusted up (you
won‘t get this option, unless you‘ve seen the bone cruncher through the
window). You’ll need to grease
them. Leave the office.
SECRET ROOM
Climb down the stairs, all the way to
the bottom. Go through the blue door on
the right.
STORAGE ROOM
Head through the blue door on the
right.
DUMPSTER AREA
Go through the door at the top.
CONVEYOR BELT AREA
Walk down a few steps. Climb up the stairs, and go through the door,
into the factory.
FACTORY
Walk down a few steps, past the hanging
pigs (and poor Tony), and make your way to the bottom left corner. Go through the door with the green light
above it.
LOG ROOM
Head down to the bottom left corner, and
enter the Smoking Room.
SMOKING ROOM
The greasy meat is still hanging from
the sealing here. Use SILK HANKIE with
the hanging meat, so it becomes a GREASE SOAKED SILK HANKIE. Leave the room.
LOG ROOM
Walk down to the wooden stairs. Climb up the wooden stairs, walk along the
platform, and go through the door, into the factory.
FACTORY
Head right, and make your way past the
hanging pigs, to the door at the top-right corner. Go through the door, into the conveyor belt
area.
CONVEYOR BELT AREA
Walk up, and head through the door at
the top.
DUMPSTER AREA
Go through the blue door on the left,
into the Storage Room.
STORAGE ROOM
Walk up through the secret door, into
the Secret Room.
SECRET ROOM
Climb up the stairs, all the way to the
top. Go through the door on the left,
into the Office.
OFFICE
Walk over to the metal filing cabinet,
and use GREASE SOAKED SILK HANKIE with the filing cabinet, to grease the
wheels. Now right-click on the filing
cabinet, and push it across the floor.
It falls through the window, into the bone crunching machine below. Now leave the Office.
SECRET ROOM
Climb down the stairs, all the way to
the bottom. Go through the door, into
the Storage Room.
STORAGE ROOM
Go through the blue door, into the
Dumpster Area.
DUMPSTER AREA
Head left & up, past the bone
crunching machine, and on to the area with the forklift truck.
Walk left to the forklift truck. Right-click on the forklift truck, and take
the MACHINE SAFETY KEYS. Now walk
right a few steps, and go back up to the bone crunching machine.
Look at the filing cabinet, sticking out
of the bone crusher machine. Insert the MACHINE
SAFETY KEYS into the bone crunching machine, then turn on the bone
crunching machine, and watch as the filing cabinet is shredded. Pick up the MP3 PLAYER from the
ground, and pick up ANNA MARIA’S MANUSCRIPT from the ground. You automatically return to your office.
~~~~~~~~~~~~~~~~~~~~~~~~~~~~~~~~~~~~~~
NEW YORK BAIL BONDS BUILDING
~~~~~~~~~~~~~~~~~~~~~~~~~~~~~~~~~~~~~~
RECEPTION AREA
Anna Maria is delighted that you found
her manuscript. You study it
together. Look at the following
sections.
- Castle
- Hell
- Fleur de lys
- Latin header
- Latin Part 1
- Latin Part 2
- Latin Part 3
- Latin Part 4
- Coats Of Arms
- Holy Man
- Fortified City
- Idol
- Knight
- Angel
- Black symbols
Back away from the Manuscript.
You need help in deciphering all the
information from the manuscript. If you
could see Andre Lobineau’s historical database, it might help, but you’re
locked out of his website. Your
co-worker Virgil has some good hacking skills, and he might be able to hack
into Andre‘s site, but he’s still mad at you, because of the MP3 incident. Talk to Anna Maria and work through all the
conversation topics.
Walk left a few steps, to where Virgil
is sitting on the settee. SAVE YOUR
GAME HERE. Try to talk to Virgil,
but he just ignores you. Give him the MP3
PLAYER you found. He finally
forgives you, and admits that he has all his music backed up on CD at
home. Talk to Virgil and work through
all the conversation topics. He gives
you a flash card, which you automatically install onto your PDA.
In your Inventory, use your PDA,
and choose the following options.
- Connect
- Lobineau’s Private Server
- OK
- Yes
Virgil explains how to hack into a
database, then gives you a demonstration.
This is complicated! Note that
the Diverters can be turned by clicking on them. This may affect the direction of the
beam. Place the Diverters like so.

Andre’s database is downloaded to your PDA. Use your mouse to scroll down through the text. Click on the red words, to read more information about that subject, and the Scroll Back button on the PDA to get back to the last page you looked at. It’s easy to get lost in the database, but make sure you click on the following subjects.
- Latin
- Historical database
- Welcome Note (for amusement)
- Baphomet
- Knights Templar
- Philippe IV (then Continue)
- Clement V
- Knights Templar (again)
- Jacques De Molay (then Continue)
When you’re ready, click on the ‘X’ at
the top right, to close the PDA.
Walk right a few steps, and examine ANNA MARIA’S MANUSCRIPT on
the desk, again.
Look at the following sections.
- Holy Man (Clement V) in the castle on the
left
- Idol (Baphomet) in the castle on the
right
- Fortified City on the right
You figure out that the Fortified City
from the Manuscript, is actually Istanbul.
So that’s your next destination.
Back away from the Manuscript.
Click on the door on the right, to leave
the building.
No comments:
Post a Comment