
GENRE: Point & Click Adventure
WHERE TO GET IT: GOG
============================================================
PART 3
============================================================
~~~~~~~~~~~~~~~~~~~~~~~~~~~~~~~~~~~~~~
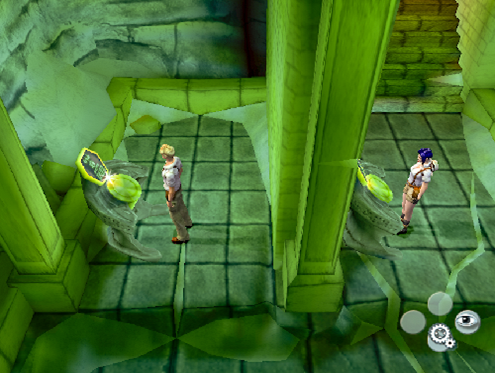
CONGO - TEMPLE (GEORGE)
~~~~~~~~~~~~~~~~~~~~~~~~~~~~~~~~~~~~~~
MECHANICAL DEVICE ROOM
SAVE YOUR GAME HERE. Explore the
room. When you are near the exit at the
top, you’ll see a large stone with a lightning symbol above the door. Look at the 4 giant mechanical devices,
leading into the centre of the room (D).
Notice that one of the mechanical devices won’t move, and it has a
touch-sensitive panel on the side. Look
at the touch-sensitive panel (D). Look
(D) at the huge hole in the centre of the room.
Note that, while 2 of the mechanical devices have energy beams flowing
into the central circle, the other 2 do not.
Look for the control console that’s
standing between 2 of the giant mechanical devices. You can see all 4 giant mechanical devices
from this point.

You have to manoeuvre the 4 mechanical
devices, and connect them together, thus, activating the crystals in the next
room.
Look at the control console device
(D). Now do the following:
- Rotate the central ring (W)
- Move bottom left mechanical device to the
centre (S)
- Rotate mechanical device in the centre
(W) 2 times
- Move device in the centre back to the
bottom left (S)
- Rotate the central ring (W) 3 times
- Move bottom right mechanical device to
the centre (S)
- Rotate mechanical device in the centre
(W) 3 times
- Move device in the centre up to the top
right (S)
- Rotate the central ring (A) 1 time
- Move top left mechanical device to the
centre (S)
- Rotate mechanical device in the centre
(W) 1 time
- Move device in the centre up to the top
right (S)
- Move bottom left mechanical device to the
centre (S)
- Move device in the centre up to the top
right (S)
Nice work George. An energy beam is now firing at the lightning
symbol above the door, into the next room.
Make sure the energy beam is indeed firing into the next room, and not
back into this room. If necessary, use
the touch sensitive panel on the side of the giant device. When you’re ready, follow the energy beam
into the small corridor.
Continue through the small corridor,
into the crystal room.
CRYSTAL ROOM
The energy beam flows through a crystal,
and then into the wall. There are
several other crystals in this room, each mounted on a pole. Look at the staircase at the far end of the
room. You have to direct the energy
beam, into the staircase. SAVE YOUR
GAME HERE. Walk over to the crystal
that’s directing the energy beam into the wall.

Now rotate the crystals like so.
- Rotate this crystal (S) 3 times
- Go left, to where the energy beam is now
pointing
- Rotate this 2nd crystal (S) 2
times
- Go down to the next crystal
- Rotate this 3rd crystal (A) 1
time
- Head up to the crystal at the top of the
room

- Rotate this 4th crystal (S) 1
time
- Go over to the machine at the top left
corner
- Look at the machine (D) and try to use
the machine (S)
- Go down to the bottom left crystal

- Rotate this crystal (S) 1 time
- Go left to the next crystal
- Rotate this crystal (S) 2 times
- Walk down to the next crystal
- Rotate this crystal (A) 1 time
Make your way back to the Mechanical
Device Room.
MECHANICAL DEVICE ROOM
Look at the touch sensitive panel on the
side of the giant mechanism you assembled earlier (D). Operate the device (S) to reverse the
direction of the energy beam. Return to
the Crystal Room.
CRYSTAL ROOM
Since you reversed the direction of the
energy beam, the machine in the top left corner has moved, allowing you access
to another touch sensitive panel at the bottom of the stairs. However, just ignore this panel for now. Climb up the stairs at the top left of the
room, that you now have access to.
BOOBY TRAPPED TILE ROOM
At the top of the stairs is the Booby
Trapped Tile Room where you left Nico.
She joins you, and you both return to the Crystal Room.
CRYSTAL ROOM
Now Nico is with you, look at the touch
sensitive panel at the bottom of the stairs (D). Open your Inventory (Space Bar) and scroll
round to NICO COLLARD icon (Left & Right Arrow Keys). Use NICO COLLARD icon with the touch
sensitive panel (S) to ask her to operate if for you. While she is doing that, make your way to the
other touch sensitive panel in the top left alcove.
Activate your touch sensitive panel
(S). Watch the short cut scene, as the
lights above the door turn on. Head over
to the doorway at the top right of the room, and go through the doorway, into
the caves.
CAVES
Walk
forward a few steps - you feel another earth tremor. Climb down to the ledge below (A). Follow Nico into the next cave, jumping over
the gap (S).
Follow
the path along, and climb up (W) the ledge at the end. Walk forward, into the Lightning Room.
LIGHTNING ROOM
Walk forward, and look at the symbol on
the door at the end of the room (D). You
can’t see any way of opening this door.
Look at the panel in the wall on the left (D), to see the lightning
symbol. Open your Inventory (Space Bar),
scroll round to the METAL PLATE (Left & Right Arrow Keys), and
insert METAL PLATE into the panel (S).
The door at the end starts to slide open… but then the METAL PLATE pops
out of place, and falls onto the ground.
There must be a way to keep the METAL PLATE in place.
Pick up the METAL PLATE from the
ground (S). Open your Inventory again
(Space Bar), scroll round to the METAL PLATE (Left & Right Arrow
Keys), and insert METAL PLATE into the panel (S). Quickly open your Inventory again (Space
Bar). Scroll round (Right & Left
Arrow Keys) to the ANCIENT SCARF, and use it (S) to keep the METAL
PLATE in place. It works, but you
can’t hold the PLATE in place, and go through the door at the same time. You automatically talk to Nico and ask her to
hold the METAL PLATE in place.
Now quickly run through the door.
CRYSTAL CAVERN
You’ve reached the Crystal Cavern, and
it looks just like the cavern in Paris, with the 3 snake heads at the end. Walk along the platform to the 3 snake heads,
and take the ALPHA STONE (S) from the beam of energy. Return to the Lightning Room.
LIGHTNING ROOM
Walk over to Nico and show her the ALPHA
STONE. SAVE YOUR GAME HERE. Head left, into the caves.
CAVES
Make your way along the ledge, then
watch the cut scene with Petra. When the
earthquake hits, Petra falls down. This
is your chance to escape! Run (Shift
& Left Arrow Key) left to the next cave.
When you reach the gap, quickly jump
over it (S), then continue running. This
is tricky, and needs quick timing, but it is possible. Climb up the wall (W), then keep running -
Petra isn’t far behind. You
automatically make your way back outside the temple.
CLEARING
Watch the cut scene with Harry.
~~~~~~~~~~~~~~~~~~~~~~~~~~~~~~~~~~~~~~
PARIS - RUE JARRY (GEORGE)
~~~~~~~~~~~~~~~~~~~~~~~~~~~~~~~~~~~~~~
NICO’S APARTMENT
Watch the long cut scene with Andre, the
Police Inspector, and Beatrice.
~~~~~~~~~~~~~~~~~~~~~~~~~~~~~~~~~~~~~~
PARIS - THEATRE (NICO)
~~~~~~~~~~~~~~~~~~~~~~~~~~~~~~~~~~~~~~
LOBBY
You’re back in the old theatre, looking
for information about Susarro. Walk
forward towards the red carpet, and go through the door into the theatre
audience area.
THEATRE AUDIENCE
Head down the aisle, to the stage. Climb up onto the stage (W).
THEATRE STAGE
Head to the top left corner, and go
through the corner to leave the stage.
LEFT OF STAGE
Go left down the stairs, then go down
the next set of stairs, into the basement.
BASEMENT
Walk down the corridor at the bottom of
the stairs, on the right.
Head up to the end of the corridor.
Walk down a few steps. Open the door on the right (S) and enter the
Dressing Room.
DRESSING ROOM
Explore the room. Look at the bust on the cabinet (D). Look at the dressing table (D). Look at the hole in the floor where the safe
used to be (D) and climb down through the hole (S) into the Maintenance
Room.
MAINTENANCE ROOM
Look at the fuse box on the wall
(D). Look at the fallen support strut in
the middle of the room (D). Look at the
broken safe on the floor (D). Look at
the ladder leaning against the wall (D).
Open the door at the top of the room (S) and leave the Maintenance
Room.
SUB BASEMENT
Walk up a few steps towards the stairs,
but DON’T climb up the stairs. Head
along the corridor before the stairs. Go
over to the door on the right, open the door (S) and enter Susarro’s
Offices.
SUSARRO’S OFFICES
SAVE YOUR GAME HERE. Explore the
room. Look at the vase on the stand
(D). Walk towards the open doorway - the
thug will grab you and try to choke you.
Quickly grab the nearby vase (S) and smash it over the head of the
thug. You knock him unconscious. Look at the briefcase on the cabinet at the
back wall (D). Search the briefcase (S),
but there is nothing useful. Now, again,
walk towards the open doorway, and enter the next room.
Walk over to the huge desk in the middle
of the room. Walk behind the desk, and
look at the security report on the desk (D).
Read the report (S) to find the postcard showing a castle in
Prague. You and George automatically
travel there.
~~~~~~~~~~~~~~~~~~~~~~~~~~~~~~~~~~~~~~
PRAGUE - CASTLE (GEORGE)
~~~~~~~~~~~~~~~~~~~~~~~~~~~~~~~~~~~~~~
OUTSIDE THE CASTLE GATES
Look at Nico (D), talk to her (S) and
work through all the conversation topics (S).
Walk over to the gate, and look at the gate (D). You need to find a way to get inside the castle. Look at the intercom on the wall to the right
of the gate (D), and use the intercom (S) to call for the butler. But you’re surprised to see that it’s an
armed guard who opens the gate. And he
won’t let you inside. Talk to Nico again
(S) and ask about the button. She will
use the intercom to call for the guard again.
Quickly hide behind the wall on the left, so you are in the
shadows. While Nico is distracting the
guard, you can sneak through the gate (Ctrl & Arrow Keys).
INSIDE THE CASTLE GROUNDS
This is a tricky section, so SAVE
YOUR GAME HERE. There are armed
guards with dogs everywhere! How are you
going to get past them?
Climb onto the wall on the left (W), and
pull yourself up (W). Lower yourself
down the other side (A) and drop down to the ground into the garden area
(A). Walk forward a few steps, so you
get a better view of the guards. The
guard on the right stays where he is, but the guard on the left keeps moving
around. Don’t hang around here for too
long, or you will be caught.
Wait for the guard to be out of your
eyeshot, then walk over to the left side of the garden area. Jump up on the wall on the left (W), and
raise yourself up (W). Wait for the guard
and the dog to be far away from you, then lower yourself down the left side of
the wall (W), then drop to the ground (A).
Now keep to the shadows! Again,
wait for the guard and the dog to be far away from you, then sneak forward
(Ctrl & Arrow Keys) to the stairs.
Climb left up the stairs, into another walled area.
Keep to the shadows, and avoid the
spotlight. Follow the wall down, until
you reach the rubbish bins. Search the 1st
bin (S) to find a PIECE OF STRING.
Then 2nd bin is empty.
Walk past the dumpsters. Search
the next bin (S) to find a HALF-EATEN BURGER. Search the last bin to find some ALUMINIUM
FOIL. Follow the wall around, still
avoiding the spotlight, until you reach the window. Look at the window (D) and peer through the
window (S). Continue along the wall -
ignore the door - until you reach an area with crates. Head down the stairs, into the area with
crates.
Notice there is 1 big crate, and 3
smaller crates. Climb up onto the big
crate (W). Note the wall on the right -
there is 1 section that’s not barricaded.
That could be your way in.
Jump down, off the big crate. Push the top smaller crate on the left, along
to the right (S & Right Arrow Key), so that the bottom smaller crate on the
left is free. Navigate the smaller
single crate round (S & Arrow Keys), so it is against the wall. Now push the top smaller crate, to the right
(S & Right Arrow Key), so it’s also against the wall. You’ll end up with the crates like this.

Now climb up onto the smaller crates
(W). Jump onto the wall on the right
(W), and raise yourself up onto the wall (W).
Lower yourself down into the passageway on the other side (A).
CASTLE PASSAGEWAY
Head down to the end of the
passageway. Climb up onto the ledge
(W). Follow the ledge round as far as
you can. Climb over the wall (W), into
the area in front of the window. Look at
the window (D) and peer through the window (S).
Walk right, to the other side of the window. Climb onto the wall on the right (W), so you
can see the guard and his dog far below.
Make sure you’re at the edge of the wall nearest the window - behind the
guard, so to speak - then follow the ledge again as far as you can.

Lower yourself, on the ledge behind the
guard (A), then drop down to the ground (A).
INSIDE THE CASTLE GROUNDS
You can see the arch leading back out of
the castle grounds at the top left. SAVE
YOUR GAME HERE. When the guard is
not looking, sneak down \ left (Ctrl & Arrow Keys) across the courtyard,
and climb down the stairs to the next area.

Wait until the guard is heading right,
then sneak right (Ctrl & Right Arrow Key) across the courtyard, through the
opposite arch, and to another area with crates.
This area is a bit more complicated than
the last area with crates. Start by
climbing into the centre of the square crates.

Now move the crates around (S &
Arrow Keys), like so.
- Push the crate below you, down 2 times
- Pull the crate on the left, right 1 time
- Climb (W) over the crate you just moved
- Push the crate above you, up 1 time
- The square crate on the left, in between
the rectangle
crates,
is now free.
- Push the crate on the left, 1 time, so
it’s against the wall
Climb up onto the crate on the left (W),
then jump up to the wall on the left (W) and raise yourself up onto the wall
(W). Lower yourself down the other side
of the wall (A), and drop down to the ground (A).
COURTYARD
Watch out for the guard. There is a dog behind the gate on the left,
and he’s not happy to see you. You have
to befriend him, so he doesn’t alert the guard.
Creep forward a couple of steps (Ctrl & Arrow Keys), then turn left
to face the dog. Look at the dog on the
left (S). Open your Inventory (Space
Bar), scroll along to HALF-EATEN BURGER (Left & Right Arrow Keys),
and give that to the dog (S). Now sneak
right (Ctrl & Arrow Keys), behind the huge crate (Ctrl & Right Arrow
Key), up to the far wall, down a few steps, and right through the arch to the
next area.
Stay close to the wall. Follow the wall down, and sneak down (Ctrl
& Arrow Keys) down, then right, until you reach the front gate, where Nico
is waiting. She tells you to find a REMOTE
CONTROL that will open the gate.
SAVE YOUR GAME HERE. Run right
(Shift & Right Arrow Key), then follow the wall, past the huge crate, until
you reach the truck. Staying close to
the wall, run past (Shift & Left Arrow Key) the rest of the trucks, until
you see the small door. There is a
strange wall to the left of the door.
Find the button on the wall, and press the button (S). The button opens the nearby gate, but then it
closes again when you let go. Leave the
gate for now. Follow the wall left &
along, past the archway, and on to the jeep.
Look at the jeep (D), and search the jeep to find a REMOTE CONTROL. This is what Nico asked you to find. Look at the glove compartment of the jeep
(D). Now head right, staying close to
the wall, and make your way back to where Nico is waiting at the front
gate.
Look at the gate (D). Open your Inventory (Space Bar), scroll round
to the REMOTE CONTROL (Left & Right Arrow Keys), and use it on the
gate (S). The gate opens, Nico enters,
and you both hide from the guards.
From your hiding place behind the crate,
follow the wall along, past the trucks and the archway, until you reach the
strange gate with the button again. Talk
to Nico (S) and ask about the button.
She agrees to push the button to open the gate. While she is doing that, you walk through the
gate, into some kind of hut.
Take CAR JACK HANDLE from the
door on the left (S). Pick up PIECE
OF COAL from the corner. Walk right
to leave the hut.
Continue left, to where the black car is
parked in the alcove. Climb up onto the
car (W). Look at the window (D) and peer
into the window (S). You can see a store
room. Face the window, open your
Inventory (Space Bar), scroll round to the CAR JACK HANDLE (Left &
Right Arrow Keys), and use it to open the window (S). Try to climb through the window (S), but it‘s
too small. Open your Inventory again
(Space Bar), scroll round to the NICO COLLARD icon (Left & Right
Arrow Keys), and talk use it on the window (S).
Nico climbs in through the window.
Since you can’t get through the window, you’ll have to find another way
in.
Head right, back to the jeep. Walk to the back of the jeep. Look at the car jack (D) at the back of the
jeep. Open your Inventory (Space Bar),
scroll round to the CAR JACK HANDLE (Left & Right Arrow Keys), and
use it on the car jack (S). You lower
the car jack, thus releasing the jeep.
Go to the front of the jeep and release the handbrake (S). Go to the back of the jeep, and push the jeep
into the wall (S). Go to the front of
the jeep, and climb up onto the bonnet (W).
Now climb up to the wall (W) and pull yourself up onto the roof of the
building (W). Walk forward a few steps,
and look at the drainpipe on the top left corner (D). Climb up the drainpipe (S), up to the ledge
above. There’s no going back now.
~~~~~~~~~~~~~~~~~~~~~~~~~~~~~~~~~~~~~~
PRAGUE - CASTLE INTERIOR (NICO)
~~~~~~~~~~~~~~~~~~~~~~~~~~~~~~~~~~~~~~
WINE CELLAR
Look at the old wine barrels (D), and
try to use it (S). The barrel tap is too
stiff for you to move. Look at the suit
of armour in the top corner (D). Climb
up the stairs and open the door (S).
GROUND FLOOR CORRIDOR
Eavesdrop on the guards in the
foyer. The don’t know what Petra looks
like. So if you could disguise yourself
as Petra, the guards won’t know it’s really you. Climb up the stairs to the 1st
Floor Hallway.
1ST FLOOR HALLWAY
Follow the hallway forward a few steps,
then go through the doorway on the far right, into the balcony.
1ST FLOOR BALCONY
Take a step forward, then watch the cut
scene as you hide, to avoid being caught by the guards. After the guards have gone, head left along
the balcony, and keep going, past the stairs, until you reach the doorway with
the red velvet curtains. Head through
this doorway, into another corridor.
1ST FLOOR HALLWAY
Follow the corridor along, past all the
locked doors, until you reach the end of the corridor. The door on the left is the only unlocked
door. Open the door (S), and enter
Petra’s bedroom.
PETRA’S BEDROOM
Explore the bedroom. Look at the dresser near the door (D) and try
to open it (S), but it’s locked.
Head up to the dressing screen next to
the bed, and walk behind it. Look at the
large chest behind the dressing screen (D), and open it (S). Look at the opened chest to see the BROWN
WIG (S). Focus on the BROWN WIG (Page
Up & Page Down) inside the chest, then pick up the BROWN WIG (S). Look at the opened chest again (D) to realise
that there is a secret compartment.
Examine the opened chest (S) to find a tiny button that will open the
hidden compartment. Unfortunately, your
fingers are too large to press the tiny button.
Open your Inventory (Space Bar), scroll round to the PENCIL (Left
& Right Arrow Keys), and use the PENCIL with the tiny button in the
large chest (S). The secret compartment
opens, and you see knives and other weapons.
Look at the secret compartment (D).
Stand at the left compartment of the chest, and look at the GRIND
STONE (D), then pick up the GRIND STONE (S).
Walk back out to the bedroom. Look at the large chest at the foot of the bed
(D) and open the large chest (S). Look
at the HAIR DRYER inside the chest (D), focus on the HAIR DRYER (Page
Up & Page Down), and pick up the HAIR DRYER (S).
Head up into the en-suite bathroom. Look at the sink (D) and try to use the sink
(S). That’s all you can do here. When you’re ready, leave the en-suite
bathroom and leave Petra’s bedroom.
1ST FLOOR HALLWAY
Follow the hallway along, back to the
balcony.
1ST FLOOR BALCONY
Head right along the balcony, past the
stairs, and into the hallway with the black & white zig-zag floor.
1ST FLOOR HALLWAY
Make your way along the hallway, down
the stairs, and back to the Ground Floor corridor.
GROUND FLOOR CORRIDOR
Sneak out (Ctrl & Arrow Keys) into
the foyer.
GROUND FLOOR FOYER
Stay close to the walls, so the guards
don’t see you! Sneak left (Ctrl &
Left Arrow Key) to the other side of the foyer.
Open the door (S), and head into the kitchen.
KITCHEN
Walk over to the Chef, and talk to him
(S). He’s obviously very stressed and
over-worked. Poor man. Ask him about the GRIND STONE (S). When he turns his back to sharpen his knife,
look at the vegetables he was chopping (D) and try to pick them up (S), but you
suddenly don’t have much of an appetite.
Look at the freezer in the corner (D).
Walk over to the shelves on the wall, opposite the cooker. Look at the INDUSTRIAL BLEACH on the
shelves (D) and take the INDUSTRIAL BLEACH (S). When you’re ready, walk over to the door, and
leave the kitchen (S).
GROUND FLOOR FOYER
Stay close to the walls, so the guards
don’t see you. Sneak right, to the other
side of the foyer (Ctrl & Right Arrow Key).
Head right, into the corridor with the black & white zig-zag
floor.
GROUND FLOOR CORRIDOR
Climb up the stairs to the 1st
Floor Hallway.
1ST FLOOR HALLWAY
Follow the hallway forward a few steps,
then go through the doorway on the far right, into the balcony.
1ST FLOOR BALCONY
Head left along the balcony, and keep
going, past the stairs, until you reach the doorway with the red velvet
curtains. Head through this doorway,
into another corridor.
1ST FLOOR HALLWAY
Follow the corridor along, past all the
locked doors, until you reach the end of the corridor. The door on the left is the only unlocked
door. Open the door (S), and enter
Petra’s bedroom.
PETRA’S BEDROOM
Make your way into the en-suite
bathroom.
It’s time to disguise yourself as
Petra. Look at the sink (D). Open your Inventory (Space Bar), scroll round
to the BROWN WIG (Left & Right Arrow Keys), and use the BROWN WIG
in the sink (S). Open your Inventory
again (Space Bar), scroll round to the INDUSTRIAL BLEACH (Left &
Right Arrow Keys), and use the INDUSTRIAL BLEACH in the BROWN WIG in
the sink (S). Look at the WIG in
the sink (D) to see that the bleach has done it’s job. Try to pick up the WIG (S), but it’s
soaking wet. You’ll have to dry it
out. Open your Inventory (Space Bar),
scroll round to the HAIR DRYER (Left & Right Arrow Keys), and use
the HAIR DRYER (S). Watch the cut
scene as you dry the now-blonde wig, then wear the wig. The guards will think you’re Petra now, so
you’ll have free run of the castle.
Leave the en-suite bathroom, and leave the bedroom.
1ST FLOOR HALLWAY
Follow the hallway along, back to the
balcony. A guard will confront you…
No comments:
Post a Comment