
GENRE: Point & Click Adventure
WHERE TO GET IT: GOG
============================================================
PART 2
============================================================
~~~~~~~~~~~~~~~~~~~~~~~~~~~~~~~~~~~~~~
PARIS - BOOK REPOSITORY (GEORGE)
~~~~~~~~~~~~~~~~~~~~~~~~~~~~~~~~~~~~~~
STREET
Bruno has brought you to a book
repository, here in Paris, to look for Susarro.
Look at Bruno (D), talk to Bruno (S), and work through all the
conversation topics (S). Walk down the
street a few steps, and look at the book repository door on the right (D). Try to open the book repository door (S), but
it’s locked, so you have to find another way inside. Head through the archway, into the alley next
to the door.
Follow the alley down & left, until you see the dumpsters next to the window. There is a crate under the window. Drag the crate (S & Arrow Keys) so it’s in the gap to the right of the dumpster with the ‘R’ sign.

Climb up onto the crate (W), then turn
to face left. Look at the dumpster on your left (D) to see that the lid has
been propped open. Pull the lid down
(S), then climb up onto the lid (W), so you are standing on top of the
dumpster. Stand in front of the window,
and look at the window (D) to see that one of the panes is smashed. Unlatch the window (S), then enter through
the window (S), so you are inside the book repository.
STORE ROOM 1
It’s very dark in here. Head down, towards the other side of the
room. Next to the metal door is a light
switch. Try to turn on the light switch
(S). Unfortunately, the light switch is
broken. You can’t really do much in this
dark room, so just open the metal door next to the light switch (S) and leave
the room.
BOOK ROOM
It’s still really dark. Head up to the top of the room, then open the
door at the top left (S), and enter another storage room.
STORE ROOM 2
In the corner of the room, next to the door, is a light switch. Try to turn on the light switch (S), but a box is in the way. You’ll need to move that box, to get access to the light switch. Walk down & right, to the box in the opposite corner.

Drag the box up (S & Arrow Keys),
then drag it left, along to the gap near the door.

Push the box into the empty space (S
& Arrow Keys). Now climb up onto the
boxes (W), turn to face the right, and drag the top box away from the light
switch (S & Left Arrow). Jump down
from the box. Now look at the light
switch next to the door (D), and turn it on (A). Finally!
You have light!
Look at the floor in front of the middle
boxes (D) to see some deep scratches.
That calls for some investigating.
Climb up onto either of the single boxes (W), then push the top box
along to the end (S & Arrow Keys).
Jump down from the box. Drag the
middle box back to the other side of the room, where you originally got it (S
& Arrow keys). Now go to the pile of
boxes next to the door. Look at the
floor at the now-empty space (D) to see a trap door. Open the trap door (S) and climb down into
the passage.
PASSAGE
Follow the passage along to the
end. Climb up the ladder (S) to the
Boiler Room.
BOILER ROOM
Walk forward a few steps, and look at
the red boiler. Climb up the next ladder
(S) to the theatre.
~~~~~~~~~~~~~~~~~~~~~~~~~~~~~~~~~~~~~~
PARIS - THEATRE (GEORGE)
~~~~~~~~~~~~~~~~~~~~~~~~~~~~~~~~~~~~~~
THEATRE AUDIENCE
Watch the cut scene with Nico, Petra,
and Susarro. You have to find a way to
rescue Nico. After Sussaro leaves, walk
left towards the door, but DON’T go through the door. Walk down the aisle next to the wall. Head through the door at the end of the
aisle, next to the stage, into the next room.
RIGHT OF STAGE
Don’t climb up onto the stage, because
the thug will shoot you dead. Climb the
ladder (W) up to the gangway.
GANGWAY
Head down & right towards the back
wall. Look at the rope (D) that’s
holding up the lighting rig. Untie the
rope (S). The lighting rig lowers
slightly, but then jams. Jump up to the
lighting rig (W), and shimmy left (Up Arrow Key), over the gap to the other
side. Drop down (A) onto the rigging on
the other side.
Follow the rigging along, until you
reach the sandbags. Untie both sandbags
(S), so they drop down onto the thug below.
The first one misses, but the 2nd one lands on him, knocking
him unconscious.
THEATRE STAGE
Watch the cut scene, as you and Nico are
finally reunited. You realise that you
are both working on the same case! Look
at Nico (D), talk to her (S), and work through all conversation topics
(S). Look at the unconscious thug on the
floor (D), and search him if you like (S), but you don’t find anything
useful. Notice the trapdoor in the floor
- you can’t do anything with it yet. Go
to the top left corner of the stage, and leave the stage.
LEFT OF STAGE
Climb left down the stairs. Nico will follow you. Head down the next set of stairs, into the
basement.
BASEMENT
The constantly changes camera angles
make this area very tricky. Walk down
the corridor at the bottom of the stairs, on the right.

Head through the gap in the fence on the
left.
This area is under the stage. Walk down & left, to the other corner of
the room. Look at the box of theatrical
make-up (D) in the left corner.

Take a
stick of THEATRICAL GREASE PAINT from the box (S). Walk down a few steps, and look at the alley
scene (D). Walk over to the other side
of the room, and look at the market backdrop (D). Now walk over to the lift platform area.

Look at the counter weights inside the
lift (D). Look at the button to the left
of the lift (D), and push the button (S), to learn that it operates the
trapdoor above you. Now head to the door
at the top right corner, go through the door to leave the room.
You’re back at the gap in the
fence. Walk up to the end of the
corridor. At the end of the corridor,
when the camera angles changes, walk up to the end of the corridor. There’s a wooden door in the alcove here -
open the wooden door (S), and go through, into the sub-basement.
SUB-BASEMENT
Climb down the stairs. You hear gunshots being fired, and a man
yelling. Watch the cut scene. The terrified man has barricaded himself
inside the room, where’s he’s safe. Walk
down a few steps, so you can see the stairs again, but don‘t go up the
stairs. Head up a few steps, away from
the stairs. Open the door in the left
wall (S), and enter through the door, into the maintenance room.
MAINTENANCE ROOM
Explore the room. Look at the fuse box on the wall. Look at the ladder. Look at the support strut in the middle of
the room (D) - it’s holding up the room above.
There’s nothing you can do here at the moment, so when you’re ready,
open the door (S) and leave the room.
SUB-BASEMENT
Head down, and follow the corridor round
to the end. You find a dead man on the
ground. Look at him (D) to see that he’s
been badly mutilated. Search him (S),
but he has nothing useful. Look a the
big metal door in the back wall (D).
Look at the card reader to the right of the door (D) - unfortunately,
you don’t have the card that activates it.
Back-track along the corridor, until you see the stairs again. Climb up the stairs, open the door at the top
of the stairs (S), and go back to the
little alcove in the corridor.
BASEMENT
Head straight along the corridor, to the
other end. Open door on the right (S),
and enter the Dressing Room.
DRESSING ROOM
Explore the Dressing Room. Look at the wig mannequin on the cabinet
(D). Look at the drawers in the
dresser. Look at the safe on the floor,
under the dresser (D), and try to open it (S), but it‘s locked. You can’t do much here at the moment, so when
you’re ready, open the door (S) and leave the room.
BASEMENT
Walk down a few steps, then head left
along the corridor.

This is the fenced area you were at
earlier. Walk down to the end of the
corridor, then turn right, and climb up the stairs.
LEFT OF STAGE
Follow the red carpet left, and go
through the door on the left, back to the audience area.
THEATRE AUDIENCE
Head straight up the aisle, to the back
of the theatre. Go left (ignore the
ladder heading down), and go through the doors on the left, into the
foyer.
FOYER
Explore the foyer. Walk down to the brown doors, and look at them (D) - this is the main entrance in & out of the theatre. Look at the theatrical poster on the wall (D). Find your way to the Refreshments Counter, and go behind the counter.

Look at the popcorn counter on the left
(D). Look at the empty popcorn maker on
the left (D). Look at the drinks maker
on the back wall (D). Look at the door
on the back wall (D). Look at the cash
register on the right (D). Look at the
cash register on the right (D). Look at
the PAPER DISPOSABLE CUP on the floor (D), and pick up the PAPER
DISPOSABLE CUP (S). Leave the
Refreshments Counter.
Head right, and make your way back to
the red carpet. Follow the red carpet,
and return to the audience area.
THEATRE AUDIENCE
Head down the isle, to the stage. Climb up onto the stage (W).
THEATRE STAGE
Look at the stage lights at the front of
the stage (D), and touch the stage lights (S). They’re extremely hot! Hot enough to melt something! Open your Inventory (Space Bar), and scroll
to (Left & Right Arrow Keys) THEATRICAL GREASE PAINT. Select THEATRICAL GREASE PAINT (A),
then scroll along (Left & Right Arrow Keys) to PAPER DISPOSABLE CUP,
and combine them (A), so you get CUP HOLDING GREASE PAINT. Look at the hot stage light again (D). Now open your Inventory again (Space Bar) and
scroll along (Left & Right Arrow Keys) to CUP HOLDING GREASE PAINT,
and use this (S) with the hot stage
light. You now have some MELTED
GREASE PAINT. Go to back to the top
left corner of the stage, and leave the stage.
LEFT OF STAGE
Climb down stairs on the left, then
climb down the next set of stairs to the basement.
BASEMENT
Walk along the corridor at the bottom of
the stairs, on the right.
Head up the corridor, to the end.
At the end of the corridor, when the
camera angle changes, head up to the end of the corridor. The little alcove is hear. Open the door in the alcove (S), and enter
through the door into Sub-Basement.
SUB-BASEMENT
Climb down the stairs. Walk straight up the corridor for a few
steps. Open door on the left (S) and
enter the maintenance room.
MAINTENANCE ROOM
Look at the support strut in the middle
of the room (D). Try to push the support
strut (S), but it won’t budge. Open your
Inventory (Space Bar) and scroll (Left & Right Arrow Keys) to MELTED
GREASE PAINT. Use MELTED GREASE
PAINT with the strut (S) to lubricate it.
Now try to move the strut again (S) - you still can’t shift it. Talk to Nico (S) and work through all the
conversation topics (S). Maybe Nico
could help you move the strut. Look at
the strut in the floor again (D). Open
your Inventory (Space Bar) and scroll through to NICO COLLARD icon. Use NICO COLLARD icon with the strut
(S). She obliges, and together, you
manage to move the strut. The safe in
the Dressing Room above falls through, and smashes onto the floor. That’s one way to crack a safe! Look at the opened safe (D), and take SECURITY
SWIPE CARD and CRYSTAL COVERED ARTEFACT (S) from the safe. Now open the door (S) and leave the
room.
SUB-BASEMENT
Head down, and follow the corridor round
to the end. Look at the huge metal door
(D) and look at the electronic card reader (D) next to the door. Open your Inventory (Space Bar) and scroll
round to SECURITY SWIPE CARD (Left & Right Arrow Keys). Use the SECURITY SWIPE CARD in the
card reader (S). A lift is
revealed. Watch the cut scene as you
& Nico travel downwards.
TUNNEL
Walk along the tunnel, and continue
along until you see a stone carving with a forked lightning symbol, lying on
the floor. Continue up the tunnel until
you reach the cavern.
CAVERN
Watch the cut scene. Walk along the bridge, to the 3 giant snake
heads. Watch another cut scene. Take OMEGA STONE that’s floating in
the column of plasma (S). SAVE YOUR
GAME HERE. Walk back along the
bridge. Watch the cut scene with the
Grand Master. When Susarro and Petra
come up in the lift, you have to hide QUICKLY.
As soon as you’re able, copy Nico, run (Shift & Arrow Keys) to the
left edge of the bridge, and climb down (A), so you are hanging on the edge. When Susarro and Petra pause to see what
happens next, shimmy left towards Nico.
When you are ’behind’ Susarro, climb back up (W), and QUICKLY run left
to the lift (Shift & Left Arrow), then QUICKLY run down the tunnel (Shift
& Down). You have to be really quick
here, and it will probably take you a few attempts. Finally, you and Nico make it back to the
lift, just in the nick of time!
TUNNEL
Nico is holding the lift doors open so
the Susarro and Petra can’t get up here.
But she can’t hold them forever -you’ll have to find something else to
keep the doors open. Look at the lift
doors. Open your Inventory (Space Bar),
scroll round to the BOTTLE OPENER (Left & Right Arrow Keys), and use
BOTTLE OPENER to jam the life doors (S).
Follow the tunnel back to the stairs.
Climb up the stairs, go through the door (S), and enter the
Basement.
BASEMENT
Head up the corridor a few steps, then
go down the corridor on the left. Follow
the corridor to the end, and try to climb up the stairs on the back wall, but
Susarro has left guards there. You need
to find another way out.
Head back into the corridor on the
right. Walk up a few steps, and head
through the gap in the fence.
This area is under the stage. Go to the lift platform in the middle of the
room. Press the button to the left of
the lift (S) and make sure that the lift platform is down. Stand on the lift platform, and use the lift
platform (S) to rise up onto the stage.
THEATRE STAGE
Walk to the front of the stage and climb
down (A).
THEATRE AUDIENCE
Run up the centre aisle to the back of
the theatre. Walk right a few steps to
the ladder that brought you here in the first place.
STREET
As you arrive outside again, a stranger
attacks you and shocks you with a taser gun, leaving you unconscious. Watch the cut scene, as Susarro and Petra see
the safe you smashed open earlier.
~~~~~~~~~~~~~~~~~~~~~~~~~~~~~~~~~~~~~~
PARIS - RUE JARRY (GEORGE)
~~~~~~~~~~~~~~~~~~~~~~~~~~~~~~~~~~~~~~
NICO’S APARTMENT
You come round in Nico’s apartment. Nico tells you that you managed to snatch a STONE
CYLINDER from your attacker, but the attacker stole the CRYSTAL COVERED
ARTEFACT from you. Work through all
the conversation topics with Bruno, Andre, and Nico (S). You realise that the diagram you saw on the
Omega Stone is the exact same symbol you saw back in the Congo caves. So there’s nothing else for it - you have to
go back to the Congo.
~~~~~~~~~~~~~~~~~~~~~~~~~~~~~~~~~~~~~~
CONGO - TEMPLE (GEORGE)
~~~~~~~~~~~~~~~~~~~~~~~~~~~~~~~~~~~~~~
CLEARING
You manage to find your old pal Harry,
who drives you and Nico to a clearing outside the caves. Walk over to the big wooden door. Look at the door (D) and try to open the door
(S). Talk to Nico (S) and work through
the conversation topics (S). When you
ask her about the door, she will try to help you open it. While she is pulling at the door, look at the
door yourself. Open your Inventory
(Space Bar), scroll along to the METAL ROD (Left & Right Arrow
Keys), and use METAL ROD with the door (S) to break the padlock. Now open the door (S) and enter the
Temple.
MACHINE ROOM
Walk forward and go through the
archway. You feel an earth tremor.
CAVE
Poor Cholmondely’s body is still lying
on the floor here. Walk up to the Omega
Door. Look at the Omega Door (D) and
open your Inventory (Space Bar), scroll through to the OMEGA STONE (Left
& Right Arrow Keys), and insert OMEGA STONE into the Omega Door
(S). The door opens. Head up through the door, into a
hallway.
BOOBY TRAPPED HALLWAY
Be careful here - the hallway is full of
booby traps! Jump up to the wall on the
left (W) and shimmy across (Arrow Keys) to the other end of the hallway. As long as you don’t touch the floor, you’ll
be safe from the deadly spikes. When you
reach the other end, drop down to the floor (A). Now look at the giant cogs at the end of the
spike traps (D). If you could block
those cogs, you could effectively stop the deadly traps. Open your Inventory (Space Bar), scroll
through to the METAL ROD (Left & Right Arrow Keys), and push that
into the giant cogs (S). Watch the cut
scene, as Nico makes it safely across, and joins you on this side of the
hallway.
But you’re not done here yet. Look out, across the hallway, but don’t cross
over it. You see a corpse lying halfway
along. You should investigate that
corpse. Walk down to the stone blocks,
on the opposite side from the cogs. Drag
a stone block (S & Arrow Keys) to just past the nearest spikes.

Now go back and get the other stone
block. Drag it (S & Arrow Keys) so
it’s level with the spikes, so the spikes can’t close. Climb over this stone block (W), and place
yourself in between both stone blocks.
Push the first stone block (S & Down Arrow Key) down 2 times, so
it’s level with the next set of spikes.

Climb over this block (W). You’ve reached the corpse now. Look at the corpse (D) and search the corpse
(S) to find an ANCIENT SCARF. But
there’s something inside the ANCIENT SCARF. Open your Inventory (Space Bar) and look at
the ANCIENT SCARF (D) to find a METAL PLATE. Look at the ANCIENT SCARF again (D),
and look at the METAL PLATE (D) to see that they both have a lightning
symbol on them. Now turn around, climb
back over the stone blocks (W), and return to Nico. Talk to Nico (S) and work through all the conversation
topics.
Head through the doorway on the
right.
Follow the corridor into the Tile
Room.
BOOBY TRAPPED TILE ROOM
SAVE YOUR GAME HERE. The floor is
booby trapped. If you step on the wrong
tile, the ceiling will drop down and squish you. Stepping on 1 of the 4 tiles near the
entrance will show you a clear path. But
they don’t join up, so you have to hop from 1 tile to another. You’ll need Nico’s help with this. Blank tiles are always safe.
This is how to cross over the
tiles.
- Open your Inventory (Space Bar). Scroll through to
NICO
COLLARD icon (Left & Right Arrow Keys).
Talk to
her
(S) and ask her to stand on the Fish tile (S).
- Walk over to the tiles, and step onto the
tiles that are lit:
Blank,
4 fish, blank.
- Open your Inventory (Space Bar). Scroll through to
NICO
COLLARD icon (Left & Right Arrow Keys).
Talk to
her
(S) and ask her to stand on the Scorpion tile (S).
- Step onto the tiles that are lit:
6
scorpions, blank, STOP HERE.
- Open your Inventory (Space Bar). Scroll through to
NICO
COLLARD icon (Left & Right Arrow Keys).
Talk to
her
(S) and ask her to stand on the Snake tile (S).
- Step onto the tiles that are lit:
3
snakes, blank.
- Open your Inventory (Space Bar). Scroll through to
NICO
COLLARD icon (Left & Right Arrow Keys).
Talk to
her
(S) and ask her to stand on the Fish tile (S).
- Step onto the tiles that are lit:
4
fish, blank.
- Open your Inventory (Space Bar). Scroll through to
NICO
COLLARD icon (Left & Right Arrow Keys).
Talk to
her
(S) and ask her to stand on the Bird tile (S).
- Step onto the tiles that are lit:
4
birds, blank.
- Open your Inventory (Space Bar). Scroll through to
NICO
COLLARD icon (Left & Right Arrow Keys).
Talk to
her
(S) and ask her to stand on the Scorpion tile (S).
- Step onto the tiles that are lit:
6
scorpions, blank.
- Open your Inventory (Space Bar). Scroll through to
NICO
COLLARD icon (Left & Right Arrow Keys).
Talk to
her
(S) and ask her to stand on the Snake tile (S).
- Step onto the tiles that are lit:
4
snakes on the left, blank.
- Open your Inventory (Space Bar). Scroll through to
NICO
COLLARD icon (Left & Right Arrow Keys).
Talk to
her
(S) and ask her to stand on the Bird tile (S).
- Step onto the tiles that are lit:
4
birds, blank.
- Open your Inventory (Space Bar). Scroll through to
NICO
COLLARD icon (Left & Right Arrow Keys).
Talk to
her
(S) and ask her to stand on the Fish tile (S).
- Step onto the tiles that are lit:
4
fish, blank.
- Open your Inventory (Space Bar). Scroll through to
NICO
COLLARD icon (Left & Right Arrow Keys).
Talk to
her
(S) and ask her to stand on the Scorpion tile (S).
- Step onto the tiles that are lit:
4
scorpions, blank.
- Open your Inventory (Space Bar). Scroll through to
NICO
COLLARD icon (Left & Right Arrow Keys).
Talk to
her
(S) and ask her to stand on the Snake tile (S).
- Step onto the tiles that are lit:
5
snakes, blank.
You made it safely across. Jump up to grab the ledge (W) then climb up
onto the platform (W). Unfortunately,
you’ll have to leave Nico behind for the moment. Walk through the doorway, into the next
corridor.
CORRIDOR
Most of the corridor in this room has
fallen away. Walk to the edge of the
ledge, and lower yourself down (A).
Shimmy left to the platform below, and drop down onto it (A). Jump across (S) to the platform on the
right. Lower yourself down (A), and
shimmy across (Arrow Keys) until you’re above the next platform. Drop down (A) onto the platform. Now jump down to the next platform on the
right (A), then jump down to the ground (A).
Walk over to the thing that’s glimmering on the floor. Look at it (D) to learn that it’s crystals
embedded in the rock. Now head through
the stone archway, into the cavern.
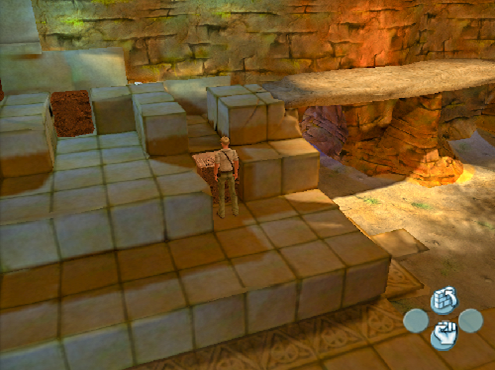
CAVERN
Wow, this is a huge cavern! A giant slab of stone is balanced on top of a
stalagmite, like a see-saw. Above you,
on the right, is the way out. Walk
forward a few steps, then turn left, and climb up onto the stones on the left
(W).
Climb up onto the stones at the back
(W). Now walk right, onto the giant slab
of stone (S). When you get near the end
of the slab, it tilts, and you slide off it.
If you could stop one side from tilting, you could get across this
over-sized see-saw. This is a
complicated procedure, and very tedious.
Head left again, and climb up the stones on the left (W) like you did before. Make your way to the 2 red boxes.

Climb behind the box on top (W) and push it forward 1 time (S & Down Arrow Key). Climb out of the gap you’re currently standing in (W). Now drag the box left, and back (S & Arrow Keys) so it’s next to the other box that’s perched higher up.

Go right a few steps, back to where the
1st red box is. Drag this box
(S & Arrow Keys) left, and manoeuvre it (S & Arrow Keys) into the slot
in front of the box that’s on top of the ledge.

The boxes are at 3 different levels -
top, middle, and bottom. Push the
mid-level box back (S & Up Arrow), so it’s next to the top-level box. Now climb up to the top-level box (W). Drag the top-level box right 3 times (S &
Right Arrow Key), so it’s on the platform with 9 stones. Go to the mid-level box. Manoeuvre it down, right. & back a few
times (S & Arrow Keys), so it’s in the slot to the right of the top-level box.

Go left, to the bottom-level box. Manoeuvre it along (S & Arrow Keys), so
it’s in this position.
Climb up the stones to the top-level box
- the platform with 9 stones (W).

Push the box right a few times (S & Right Arrow Key), to here.

Now manoeuvre the mid-level box (S & Right Arrow Key), so it‘s to the right of the top-level box.

Climb up to the top-level box (W), and
drag it right, until it‘s on the edge of the see-saw.

Now simply walk right, across the
see-saw. Phew! That was exhausting! When you get to the end, jump across the gap
(S), then continue right, into the Mechanical Device Room.
No comments:
Post a Comment