
GENRE: Point & Click Adventure
WHERE TO GET IT: GOG
============================================================
PART 4
============================================================
PRAGUE - CASTLE (GEORGE)
~~~~~~~~~~~~~~~~~~~~~~~~~~~~~~~~~~~~~~
ROOF
You’re on the roof above the courtyard,
still looking for a way into the castle.
Walk down, until you see the crate.
Navigate the crate into the side passage (S & Arrow Keys), so it’s
up against the stone wall.

Climb up onto the crate (W), then jump
up to the wall (W) and raise yourself up onto the wall (W). Walk forward, until you reach the door. Try to open the door (S), but it’s locked. Climb over the wall on the right (W), and
walk along the ledge a few steps. Look
at the damaged gargoyle (D), and push the damaged gargoyle off the ledge
(S). Now continue along the ledge until
you see a large gap in front of you. The
ledge is a lot narrower now. Face the
wall, then hug the wall (S), and continue over the ledge.

When you get over the gap, step away
from the wall (S), and continue along the ledge, until you see the balcony
below you. Now walk to the edge of the
ledge, then lower yourself down the side of the wall (A), and drop down onto
the balcony (A). It’s a long drop, but
you can do it. Stand on the right edge
of the ledge, facing the window. Jump up
(W) to the ledge above, and shimmy along to the next ledge. Drop down (A) onto that ledge. Look at the opened window opposite the ledge
(D), and climb through the window (S), into the Store Room.
STORE ROOM
Try to open the door (S), but it’s
locked. Walk down a few steps and look
at the old oil lamp hanging on the wall (D).
Turn the old oil lamp on (S), and oil starts dripping onto the
floor. Turn the old oil lamp off again
(S). Climb up onto the crates at the
back of the room (W), and climb into the small gap in amongst the crates
(W).

Push the large crate on the top, back (S
& Up Arrow Key). Climb back over the
crates again (W). Move the lower crate that is now free.

Move this crate into the gap at the back
wall (S & Arrow Keys).

Climb up onto the crates at the back
wall (W). Pull the crate that’s on top,
over to the right (S & Arrow Keys).
Now go back to the left. The
crate on the left is now free. Pull it
away from the wall (S & Down Arrow Key).
Climb over the crate (W) and climb
through the window (S), onto the Walkway.
WALKWAY
Follow the Walkway along, climb down all
the stairs, and continue into the courtyard.
COURTYARD
At the bottom of the stairs, walk
forward into the narrow section. There’s
an old drainpipe on the left. Look at
the drainpipe (D), try to use the drainpipe (S), and take the TIN CUP on
the drainpipe (A). Now leave this narrow
section of the courtyard, walk forward, and head back up the stairs you just
came from.
WALKWAY
Climb up all the stairs, and head back
along the Walkway, to the end. Climb
through the window on the left (S), back into the Store Room.
STORE ROOM
Climb over the crates (W), and go back
to the old oil lamp on the wall on the left.
Turn on the old oil lamp (S), so the oil starts dripping again. Open your Inventory (Space Bar), scroll round
to the TIN CUP (Left & Right Arrow Keys), and use the TIN CUP to
collect some oil (S), so you now have CUP FILLED WITH OIL. Turn off the oil lamp again (S). Climb over the crates at the back wall
(W). Climb through the window a the back
left (S).
WALKWAY
As before, follow the Walkway along,
climb down all the stairs, and continue into the courtyard.
COURTYARD
Explore the courtyard. Look for the iron grate on the ground, next
to the wall, between 2 trees. Look at
the grate (D) and try to open the grate (S).
It’s rusted shut. Open your
Inventory (Space Bar), scroll round to CUP FILLED WITH OIL (Left &
Right Arrow Keys), and use the oil to lubricate the grate (S). Now open the grate (S) and climb down through
the grate (S).
~~~~~~~~~~~~~~~~~~~~~~~~~~~~~~~~~~~~~~
PRAGUE - CASTLE INTERIOR (NICO)
~~~~~~~~~~~~~~~~~~~~~~~~~~~~~~~~~~~~~~
GROUND FLOOR FOYER
Your disguise worked. The guards think you are Petra. Look at both guards at the foot of the stairs
(D), talk to them (S), and work through all the conversation topics (S). Walk left a few steps, look at the guard
behind the desk (D), talk to him (S), and ask about Bruno. Look at the door behind the guard (D) and try
to open it (S). You realise it’s
operated by a card reader. Talk to the
guard behind the desk again (S) and ask about the security door (S). When he asks you about the Security Sergeant,
decide if you want to tell him ‘Yes’ or ‘No’.
It seems that the Security Sergeant has your PASS CARD for the
security door. Let’s go and find
him. Open the front door (S), and go
outside to the courtyard.
COURTYARD
You need to find the Security Sergeant,
so you can get your PASS CARD.
Look at the guard outside the door (D), talk to him (S), and ask about
the guard dog (S). Walk right, to the
other guard. Look at him (D), talk to
him (S), and ask about the guard dog (S).
Continue right, through the wall and down the stairs, and into the next
courtyard.
There’s an archway on either side, plus
a door at the end. There’s also a guard
here, but he doesn’t have anything interesting to say. Head up towards the door, and head up the
path to the left of the door. It’s hard
to spot, but it’s there.

Look at the guard standing in the
archway on the right (D). This is the
Security Sergeant. Talk to him (S), and
he’ll give you an UNVALIDATED CARD, which you’ll need to get
validated. Head back along the path, the
way you came.
Climb up the stairs at the bottom of the
screen.
Head left a few steps, to the front
door. Open the front door (S) and enter
the castle again.
GROUND FLOOR FOYER
Head right a few steps, to the
door. Open the door (S), and enter the
Security Room.
SECURITY ROOM
Look at the various computers if you
like (D), but you can’t use them, since you don’t know what you’re doing. Walk down, to where the Technician is
sitting. Talk to her (S) and work
through the conversation topics (S). She
validates your card then throws it down onto the desk beside her. Pick up the VALIDATED CARD. Now open the door (S) and leave the
room.
GROUND FLOOR FOYER
Make your way back over to the guard
behind the desk. Look at the security
door behind the desk (S) and try to open it (D). You can‘t use the door directly. Okay then, focus on the card reader on the
door (Page Up). Now open your Inventory
(Space Bar), scroll round to VALIDATED CARD (Left & Right Arrow
Keys), and use that with the security door (S).
You’re finally able to open the door, and enter the Dungeon.
DUNGEON
Walk forward, then climb down all the
stairs to the bottom. Look at the prison
cell next to the stairs (D). Go through
the arch, and follow the path along, until you see someone coming. You automatically pick up the fire
extinguisher, ready to defend yourself.
~~~~~~~~~~~~~~~~~~~~~~~~~~~~~~~~~~~~~~
PRAGUE - CASTLE INTERIOR (GEORGE)
~~~~~~~~~~~~~~~~~~~~~~~~~~~~~~~~~~~~~~
LAUNDRY ROOM
After
managing to open the grate above, you find yourself in the Laundry Room. Explore the room. Look at the laundry tub (D). Look at the door in the corner (D). Try to open the door (S), but it’s
locked. Walk over to the row of washing
machines, and find the single, rusted, washing machine. Move the rusted washing machine onto the
trolley at the other side of the room (S & Arrow Keys).

Position yourself behind the
trolley, then push the trolley (S) into the door. It acts like a battering ram, forcing the door
open.
BASEMENT CORRIDORS
Follow the corridor down and along, and
take the 2nd exit on the right.
Walk along a few steps, then look at the door with the card reader on
the left (D). Go right a few more steps,
to the end of the corridor… and get bashed over the head by Nico. Watch the cut scene. Look at Nico (D), talk to her (S), and work
through all the conversation topics (S).
SAVE YOUR GAME HERE. Walk
up to the end of the corridor, and turn left.
Follow the corridor to the end.
You see a room with a guard. This must be where Bruno is being held. Nico could get past here, since she is
disguised as Petra. But you will be
shot, if any of the guards see you. You
need to find a disguise. Head back down
the corridor, and take the corridor on the left, back to the door with the card
reader. If only you could open this
door! Open your Inventory (Space Bar),
scroll round to NICO COLLARD icon (Left & Right Arrow Keys), and use
that on the door (S). Nico uses her
security card to unlock the door. Now
open the door (S) and enter the Guard Room.
GUARD ROOM
Walk over to the locker in the
corner. Look in the locker (D) to see a
guard’s uniforms, and use the locker (S) to change into a guard’s uniform. Now you don’t have to worry about the guards
shooting you. Open the door (S) and
leave the room.
BASEMENT CORRIDORS
Head up, to the end of the
corridor. Turn left, and follow the
corridor up to the end. The guard opens
the door, and allows you to go through.
Walk forward a few steps, and climb down
the stairs. Go forward again, and look
at the door with the numeric keypad (S).
You don’t have the code for the door, so leave it alone for now. Turn right, and follow the corridor down,
until you reach the cell.
Walk through the cell door, into the
cell. You can hear laboured breathing,
as if someone is in pain. Notice the
grilled window, high above you. It’s too
far to reach. Maybe you could move the
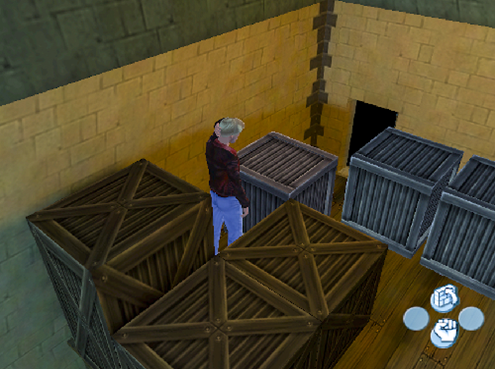
crates around, so you could reach the grilled window. There are 2 crates stacked on top of each
other, as well as 3 single crates. Move
2 of the single crates (S & Arrow Keys), so they‘re in front of the stacked
crates, like so.

Climb up onto the crates (W). Pull the stacked crate left, to the end (S
& Arrow Keys). Now move 2 of the
single crates, so they’re in a row, leading up to the grilled window.

Push the stacked crate along (S &
Arrow Keys). Climb up onto the single
crate (W), and push the stacked crate along again (S & Arrow Keys). It should be right underneath the window
now.
Climb up onto the stacked crate (W), then
listen at the grilled window (S). Watch
the cut scene with Bruno, Susarro, and Petra in Susarro‘s office. Things are not looking good. Look at the grilled window (D), and try to
open the grilled window (S) to learn that it is screwed in place. Open your Inventory (Space Bar), scroll round
to the SILVER COIN (Left & Right Arrow Keys), and use that to
unscrew the grilled window (S). Try to
climb through the window (S), but it’s too narrow for you. Look at the window again (D). Open your Inventory (Space Bar), scroll round
to NICO COLLARD icon (Left & Right Arrow Keys), and use NICO
COLLARD icon on the window (S). She
climbs through the window, into Susarro’s office, and opens the door from the
inside.
Leave the cell. Go down the corridor to the door with the
numeric pad. Open the door (S) and enter
Susarro’s office.
SUSARRO’S OFFICE
Explore the office. Look at the green map on the wall (D). Look at the large shield on the opposite wall
(D). Look at the map of England next to
the door (D). Look at the suit of armour
next to the door (D). Look at the
bookcase in the corner (D) and try to open the bookcase (D). Hmm, you need to find the release
mechanism. Stand next to the chair
behind the desk, and look at the desk (D) to discover the release
mechanism. If necessary, shift your
focus (Page Up) to look at the desk, not the books. Now focus on the red button (Page Up), and
press the red button (S). The bookcase
creaks open, revealing a secret passage.
Now go through the secret passage and climb up the stairs.
~~~~~~~~~~~~~~~~~~~~~~~~~~~~~~~~~~~~~~
PARIS - VERNON BLIER’S APARTMENT BLOCK
(GEORGE)
~~~~~~~~~~~~~~~~~~~~~~~~~~~~~~~~~~~~~~
BEATRICE\VERNON’S APARTMENT
Watch the cut scene with Andre and
Beatrice. Nico and Andre head for Egypt
to look for St Stefan’s Holy Relic, while you make your way to Montfaucon
Square to look for more clues.
~~~~~~~~~~~~~~~~~~~~~~~~~~~~~~~~~~~~~~
PARIS - MONTFAUCON SQUARE (GEORGE)
~~~~~~~~~~~~~~~~~~~~~~~~~~~~~~~~~~~~~~
STREET
Look at the man sleeping in the yellow
truck (D). Try to talk to him if you
like (S), but you can’t wake him up.
Walk behind the truck. Look at
the workman digging up the pavement (D), talk to him (S), and work through the
conversation topics (S). Look at the
compressor near the workman (D) and turn it off (S). While the workman is busy arguing with
Alphonse in the truck, walk round to the other end of the truck. Look at the brown bag on the pavement (D) and
take the SEWER KEY from the brown bag (S). Now look at the nearby manhole (D) and try to
lift it (S). You can’t lift it with your
bare hands. Open your Inventory (Space
Bar), scroll round to the SEWER KEY (Left & Right Arrow Keys), and
use the SEWER KEY with the manhole (S).
You’re puzzled that you still can’t lift the manhole, but then the
workman tells you that the manhole has been welded down. Damn!
Explore the area. Walk left, to the café. Look at the notice on the door (D), and try
to enter the café (S). Walk right to the
fountain, and look at the fountain (D).
Continue right, to the house with the
scaffolding. Ignore the house for now,
but look for the old lady that sitting next to the urinal. Look at the old lady (D), talk to her (S),
and work through the conversation topics (S).
Enter the urinal. Walk round to
the back area, and look at the 2nd urinal from the left (D). Use this urinal (S). Now talk to the old lady again, and ask her
about the urinal (S). Leave the urinal
for now.
Walk left to the house with the
scaffolding. Go to the right side of the
house, jump up to the scaffolding (W), and pull yourself up onto the
scaffolding (W). Go to the ladder at the
end of the scaffolding, and climb up the ladder (S), up to the next level. Follow the scaffolding round, and jump over
the gap (S). Walk to the end of the
scaffolding. The old lady accuses you of
spying on her urinal, and orders you to come down. You do so.
Go back over to where the old lady is
sitting. Talk to her (S) and ask her
about the urinal. She is very particular
about ‘her’ urinal, and goes to check it.
While she is busy, walk right, back to the house with the scaffolding.
Go to the right side of the house. Again, jump up to the scaffolding (W), and
pull yourself up onto the scaffolding (W).
Go to the ladder at the end of the scaffolding, and climb up the ladder
(S), up to the next level. Follow the
scaffolding round, and jump over the gap (S).
Walk to the end of the scaffolding, and lower yourself down (A), then
drop down to the level below (A). If
you’re not quick enough, the old woman will return, and you’ll have to try
again. Follow the scaffolding to the
end, and look at the LENGTH OF ROPE that’s tied to the pole (D), then
take the LENGTH OF ROPE (S). Now
climb back up the scaffolding (W), and make your way back to the street.
Head left, back to the manhole
cover. Look at the manhole cover
(D). Open your Inventory (Space Bar),
and scroll round to the SEWER KEY (Left & Right Arrow Keys). Select the SEWER KEY (A), and combine
it with the LENGTH OF ROPE (A) to get ROPE TIED TO SEWER KEY. Open your Inventory again (Space Bar), and
use ROPE TIED TO SEWER KEY with the manhole cover (S). Watch the cut scene as you explain your crazy
scheme to the workman. Walk round to the
front of the truck, and talk to Alphonse (S).
Watch the cut scene as he drives off, taking the manhole cover with
him. Now climb down, into the sewers
(S).
SEWERS
Walk over the plank, to the other side
of the sewers. Look at all 3 arches (D)
and try to use them (S). Head left, and
round the corner.
Walk left a few steps, and look at the
door with the skull (D). Search the
skull (S), but to no avail. Open your
Inventory (Space Bar) and scroll round to the STONE CYLINDER (Left &
Right Arrow Keys). Insert the STONE
CYLINDER into the skull on the door (S).
The door slides open. Walk
through the door, and down into St Stefan‘s Headquarters.
~~~~~~~~~~~~~~~~~~~~~~~~~~~~~~~~~~~~~~
PARIS - ST STEFAN’S HEADQUARTERS
(GEORGE)
~~~~~~~~~~~~~~~~~~~~~~~~~~~~~~~~~~~~~~
CATACOMBS
Follow the path along. Ignore the opening on the right for now. Continue along until you reach the room with
the candles.

Continue down, then climb up the stairs
at the other end of the room. Watch the
cut scene as you eavesdrop on the guards behind the door. You have to find a way in, without the guards
seeing you. Head back the way you came,
until you see the opening on the right.
Go right, into this opening.
Follow the path along a few steps, to
the pool of blood. Look at the pool of
blood (D). Follow the trail of blood up
along the path, until you see the opening on the right.

Go through the opening on the
right. Walk forward a few steps. There is a door on either side - enter the
door on the right.
LOUNGE
You arrived too late. Susarro’s men have already been here, and
brutally murdered the Templars. Look at
the Templar behind the door (D), and
search him (S) to find an OLD IRON KEY.
Explore the room. Walk over to
the counters on the right. Look at the
coffee machine on the counter (D). Look
at the microwave (D). Look at the sink
(D). Look at the other 3 Templars
(D). Look at the fireplace (D). When you’re ready, leave the room.
CATACOMBS
Head up the tunnel, and continue to
the arch at the end of the tunnel. There’s a guard in the kitchen, so you can‘t
enter. You have to distract him, which
won‘t be easy. Walk back down to where
there is a door on each side, and enter the door on the right.
LOUNGE
SAVE YOUR GAME HERE. This puzzle
is tricky, and you need to be quick.
Look at the microwave on the counter on the right (D), and use the
microwave (S) to set the 10 second timer.
Now quickly, leave the room.
CATACOMBS
Run into the locker room on the
left.
LOCKER ROOM
The guard will hear the microwave ping,
and come to investigate. Wait until he
enters the lounge opposite, then leave the locker room.
CATACOMBS
Run over to the lounge door, and close
the lounge door (S). Quickly open your
Inventory (Space Bar), scroll round to the OLD IRON KEY (Left &
Right Arrow Keys), and use that to lock the lounge door (S). The guard is now locked in the lounge,
leaving you free to explore the area. Go
up, through the arch, and into the kitchen.
KITCHEN
Look at the meal lying on the guard’s
table (D). Continue forward to the end
of the room, and look at the map on the wall (D). Walk over to the shelves on the left, and
look at the canned food (D). Look at the
iron pots next to them (D). Now find the
tunnel on the other side of the room, and enter into the tunnel.
TUNNEL
Follow the tunnel along, and enter the
wine cellar.
WINE CELLAR
Follow the bloody trail along, until you
reach the wine rack. The bloody trail
ends here. How strange! The wine rack contains 5 bottles of wine -
look at them all (D), and take note of what they are. Now if you think back to the last time you
saw Andre, Andre told you about St Stefan and the relic. Andre also told you that St Stefan travelled
through Israel, Italy, Germany, Rheims, and Berentoires Preceptory. You wrote it down in your NOTEBOOK. You have to pull out the bottles of wine in
the same order as St Stefan‘s travels.
Number the bottles like so.

Now pull out the bottles in this
order.
- Focus on Bottle #5 (Page Up & Page
Down)
- Look at it (D) to make sure it’s the
Israeli wine:
Sauvignon
Blanc
- Pull out the Israeli wine bottle (S)
- Focus on Bottle #4 (Page Up & Page
Down)
- Look at it (D) to make sure it’s the
Italian wine:
Modena
Lambrusco
- Pull out the Italian wine bottle (S)
- Focus on Bottle #2 (Page Up & Page
Down)
- Look at it (D) to make sure it’s the
German wine:
Wiesbaden
- Pull out the German wine bottle (S)
- Focus on Bottle #3 (Page Up & Page
Down)
- Look at it (D) to make sure it’s the
French champagne:
Montagne
De Rheims
- Pull out the French champagne bottle (S)
- Focus on Bottle #1 (Page Up & Page
Down)
- Look at it (D) to make sure it’s the
French wine:
Chateau
Berentoires
- Pull out the French wine bottle (S)
The wine rack opens, revealing a secret
passage. You automatically enter the
secret passage.
SECRET PASSAGE
Walk down the passage a few steps, then
watch the cut scene. After the Templar
dies, look at him (D) and search him (S).
You don’t find any clues. Follow
the passage along, until you reach a door.
You automatically open the door and enter a room full of robes.
ROBE ROOM
Walk down a few steps, look at the
smashed clock (D), and note that it stopped at 3.42. Open the door on the right (S) and leave the
room.
CATHEDRAL
You find yourself in a cathedral. The door out of here is on the other side of
the cathedral. SAVE YOUR GAME HERE. There is a guard patrolling the cathedral,
and he will shoot you if he sees you.
You must use stealth here, and it’s a rather frustrating section. Stay in the shadows as much as possible. Wait until the guard is walking away from
you, then go up to the orange pulpit on the left. In the pulpit, look at the bible (D) and read
the bible (S). Wait for the guard to
climb down the stairs of the altar. When
he is walking upwards again, leave the orange pulpit, and creep (Ctrl &
Arrow Keys) round to the back of the pulpit.
Walk over to the back of the screen behind the altar. Wait for the guard in front of the altar to
walk left, so he is ‘past’ your position.
Make sure his back is turned, then quickly walk right to the end of the
altar, and climb down the stairs. Run
(Shift & Arrow Keys) over to the door at the top, open the door (S), and
enter the Templar’s Office.
TEMPLAR’S OFFICE
Explore the office. Look at the 3 stone statues along the wall
(D), and note that there is a plaque under the middle statue. Stand in front of the middle statue. Focus on the plaque underneath (Page Down),
and look at the plaque (D) to see the quote from Revelations. Try to pull the plaque (S), but it’s set into
the plinth. Look at the tapestry on the
wall behind the desk (D). Look at the
broken clock (D). Use the broken clock
(S), and set the time to the Smashed Clock Number. Nothing happens. Use the broken clock again (S), and set the
time to St Stefan‘s Number. That doesn‘t
work either. So what time WILL work? SAVE YOUR GAME HERE. Open the door (S) and leave the office.
CATHEDRAL
Stay in the shadows, and wait for the
guard to walk past you. Now run up the
stairs, and go behind the screen that’s behind the altar. Wait for the guard in front of the altar to
walk ‘past’ your position, then run right to the orange pulpit. Enter the orange pulpit. Look at the bible again (D) and read the
bible (S) to find the Revelations quote you saw on the plaque beneath the
statue. SAVE YOUR GAME HERE. Now wait for the guard to climb down the
stairs of the altar, then start walking up again. When he has his back to you, leave the pulpit
and run behind the screen that’s behind the altar. Again, wait for the guard in front of the
altar to walk ‘past’ your position, then run right into the shadows, and climb
down the stairs at the end of the altar.
Run up to the door and open it (S) to enter the Templar’s Office
again.
TEMPLAR’S OFFICE
Walk over to the broken clock. Use the clock (S) and set the time to Number
From Bible (S). Watch the cut scene with
the Preceptor Of The Temple, as he Knights you ‘Sir George‘!
No comments:
Post a Comment