
YEAR: 2014
GENRE: Point & Click Adventure
WHERE TO GET IT: GOG
============================================================
SHAY VOLTA - PART 2
~~~~~~~~~~~~~~~~~~~~~~~~~~~~~~~~~~~~~~
SHELLMOUND
~~~~~~~~~~~~~~~~~~~~~~~~~~~~~~~~~~~~~~
THE MEETING
Watch the cut
scene. Shay emerges from his ship, having crash-landed on Shellmound
Beach. Vella wakes up on Shellmound Beach, after trying to fight Mog
Chothra. Who could have known that Shay’s ship IS Mog Chothra.
Vella tries to punch Shay, misses, and ends up in his ship. At the same
time, Shay ends up on Shellmound Beach, outside of his ship for the first time
in his life!
You can continue as
Shay or Vella. But you’ll need some important information from Vella’s
side, in order to complete a puzzle in Shay’s journey, and vice versa.
You can switch between the 2 characters at any time.
This is Shay’s
journey.
CRASH SITE
Click on Shay to
continue his journey.
Your dad is trying
to communicate with you. Choose any dialogue options. Wow, your dad
is actually a real person! He’s not a computer! Look at your ship,
if you like. Walk left to the next screen.
BEACH
Climb up the stairs
on the right.
DEAD EYE PYRAMID
CAVE \ ALEX’S SHIP
You find yourself
outside a mysterious cave at the top of a volcano. Enter the cave.
Wow, the cave is
really the inside of another spaceship. You are greeted by Alex. It
was him that helped Vella destroy the monster known as Mog Chothra, which is
actually your ship. Talk to Alex, and work through all the
dialogue. Alex is trying to repair his ship - maybe you could help
him? He gives you a SCHEMATIC for one of the parts he
needs. When conversation is over, leave the ship\cave.
Walk down the stairs,
back to the beach.
BEACH
At the bottom of
the stairs is a HEXIPAL. Pick it up. The poor little
guy hasn’t survived getting thrown from the ship. Walk left a few steps,
talk to your dad, who is standing next to the trough. Work through all
the dialogue with him. He needs to find more calcium carbonate to
fine-tune his hull patch mixture.
Climb up stairs on
the left, and talk to the Marshal Dune. He’s choking on a musical pipe,
but you think this is his natural language. Leave him for now, and climb
back down the stairs.
Talk to Carol
(formally Car’l) and work through all the dialogue with her. She’s trying
to make some wire hooks.
Walk left, over the
bridge, and on to the talking tree.
CURTIS’S HOUSE
Talk to the tree
and work through all the dialogue. When conversation is over, head left,
and continue left, until the snake attacks you.
The snake wraps
itself around you, trying to squeeze the life out of you. However, it
doesn’t realise how many hug attacks you’ve survived. Just let the snake
have it’s fun, until it tires itself out and falls to the ground. Pick up
the SNAKE. Walk right, and continue right, until you’re back
on the beach.
BEACH
Walk right a few
steps, then go up the stairs to where the Marshal Dune is standing. Use
the SNAKE on Marshal Dune - the snake wraps itself around
Marshal Dune, and as it does so, the PITCH PIPE lodged in his
throat is dislodged. He can breathe again! Talk to him and work
through all the dialogue. Give him your SCHEMATIC, and use
the following dialogue option.
- I think sand is the perfect material for
making spaceship parts.
Marshal Dune will
make a GYROSCOPIC HYPERCAM MADE FROM SAND, and give it to
you. Unfortunately, since it’s sand, it’s not really useable. Leave
Marshal Dune for now.
Walk left, over the
bridge, and on to the talking tree.
CURTIS’S HOUSE
Ignore the tree for
now. Walk left to the next screen.
Walk left a few
steps, and look at the mailbox in the background. You find a FLYER about
Vella in the mailbox. Now walk right, to the talking tree.
Look at the patch
of vomit on the ground near the tree. This is the result of Vella
tormenting the poor tree earlier on, but the vomit has now become hard.
Place GYROSCOPIC HYPERCAM MADE FROM SAND on the patch of
vomit, then show FLYER to the talking tree. The tree has
flashbacks of Vella, and throws up again, all over your GYROSCOPIC
HYPERCAM MADE FROM SAND. It turns hard, thus becoming a GYROSCOPIC
HYPERCAM MOLD. You automatically pick it up. Walk left to the
next screen.
Walk left a few
steps, and enter the house.
Talk to Curtis and
work through all the dialogue. He’s into metal now, having given up
making wooden stools. Show FLYER to Curtis.
Give GYROSCOPIC HYPERCAM MOLD to Curtis, and he uses it to
create a GYROSCOPIC HYPERCAM for you. Explore the house
if you like. Climb up the stairs, and look at the stained glass
window. Leave the house through the door on the left, and climb up the
ladder to Meriloft.
~~~~~~~~~~~~~~~~~~~~~~~~~~~~~~~~~~~~~~
MERILOFT
~~~~~~~~~~~~~~~~~~~~~~~~~~~~~~~~~~~~~~
CLOUD VILLAGE
At the top of the
ladder, click on F’ther, and watch the cut scene with F’ther and Harm’ny
Lightbeard. Now talk to F’ther and work through all the dialogue.
F’ther is too afraid to climb up the ladder to rescue Harm’ny Lightbeard.
When conversation is over, climb up the ladder to where Harm’ny Lightbeard is
sitting. As you climb the ladder, the ladder descends down, dragging
Harm’ny Lightbeard down with it. Talk to Harm’ny Lightbeard and work
through all the dialogue.
Stay on the ladder,
and talk to F’ther again. Use the following dialogue options.
- Can you untie that bow on Harm’ny’s
cloud?
- Because it’s in the way of us saving
him!
F’ther will look at
the bow - it’s tangled into a horrible knot. Choose any dialogue option
to try and untangle it. No matter what you say, you won’t succeed in
untangling it. Talk to F’ther again, and use the following dialogue
option.
- You stay here, I’ll try to find a way to
help your friend.
Jump off the ladder
(it will rise up again). You’re going to need some help with that bow on
Harm’ny’s cloud. Climb down the ladder on the left, back into Curtis’s
house.
~~~~~~~~~~~~~~~~~~~~~~~~~~~~~~~~~~~~~~
SHELLMOUND
~~~~~~~~~~~~~~~~~~~~~~~~~~~~~~~~~~~~~~
CURTIS’S HOUSE
Climb down the
stairs, and leave Curtis’s house through door on the right.
Walk up to the path
in the foreground, then head right, and continue right, until you reach the
beach.
BEACH
Talk to Carol, and
use the following dialogue option.
- You seem good with your hands. Know
anything about KNOTS?
Choose any dialogue
option to describe the knot. She’s willing to draw you a diagram, except
she doesn’t have anything to write with. Leave her for now.
Walk right a few
steps, and climb up the stairs to Dead Eye Pyramid Cave.
DEAD EYE PYRAMID
CAVE \ ALEX’S SHIP
Enter the cave,
which is really Alex’s spaceship.
Talk to Alex, and
use the following dialogue option.
- Can I borrow your space pencil?
- Okay, see you later!
Alex gives you
his PENCIL. Leave the cave.
Head down the
stairs, back to the beach.
BEACH
Walk left a few
steps, and give PENCIL to Carol. She’ll give you a DIAGRAM showing
how to untie the knot. Now head left, and make your way back to Curtis’s
house.
CURTIS’S HOUSE
Climb up the stairs
in Curtis’s house, then leave through the door on the left. Climb up the
ladder, back to Meriloft.
~~~~~~~~~~~~~~~~~~~~~~~~~~~~~~~~~~~~~~
MERILOFT
~~~~~~~~~~~~~~~~~~~~~~~~~~~~~~~~~~~~~~
CLOUD VILLAGE
Jump on the ladder
on the right again. This will lower Harm’ny Lightbeard’s cloud. Now
this whole knot puzzle is HORRENDOUS! It’s horrible, and it’s
tedious. To make matters worse, it’s completely random. So brace
yourself. The aim is to untie the knot by getting the correct diagram
from Carol. Since you‘ve already tried to untie the knot, you’ll now have
a completely different knot to what you had before. Talk to F’ther again,
and use the following dialogue options.
- F’ther, could you try to describe that
knot to me?
- You stay here, I’ll try to find a way to
help your friend.
You’ll see a
picture of the knot. Repeat the process of visiting Carol, down in
Shellmound, choose the correct description, then return here.
Ask F’ther to
describe the knot for you again. You have to match the knot with the
correct untying instructions.
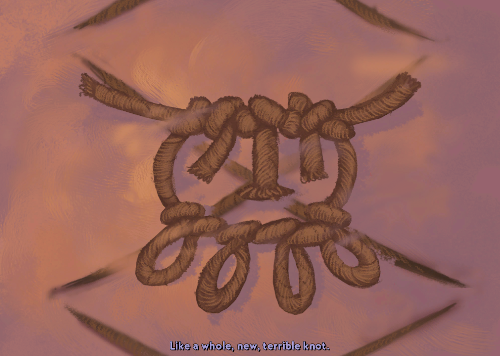
Here are the
knots. Just choose the one that matches the picture you saw, and use the
correct description with Carol.
- Like a lazy pole vaulter.

- Like a mathematical formula.

- Like a bucket of fingers.

- A little bit like you, strangely
enough.

- Like an elephant eating it’s trunk.

- Like a face that’s really a cow’s
udder.
- Like an alligator wrestling a
pretzel.

- Like a headache wearing a
belt.

Now return to
F’ther, and use the correct 3 untying instructions. Here are the correct
instructions, along with their pictures.
- Make the water come out of the cup.

- Pull apart the fighting snakes.

- Pull the finger.

- Make the baby play Pat-A--Cake.

- Unravel the sweater.

- She loves me, she loves me not…

- Tug on the piggy’s tail.

- Poke the clown in the eye.

- Tickle the foot.

- Steal the banana.

- Make The Boat Go Under The Bridge.

After you’ve
successfully untied the knot, watch the cut scene, as you discover that Harm’ny
Lightbeard’s cloud was hiding a bunch of… stuff. He’s a hoarder! A
fish plaque falls from the cloud, which will prove useful later in the
game. You also see a Heavy Duty Anti-Gravity Thrust Unit underneath the
cloud, which F’ther takes to Alex’s ship for you.
~~~~~~~~~~~~~~~~~~~~~~~~~~~~~~~~~~~~~~
SHELLMOUND
~~~~~~~~~~~~~~~~~~~~~~~~~~~~~~~~~~~~~~
DEAD EYE PYRAMID
CAVE \ ALEX’S SHIP
Since you are here,
give GYROSCOPIC HYPERCAM to Alex. Now leave the
ship.
Climb down the
stairs, to the beach.
BEACH
Head left, and make
your way back into Curtis’s house.
CURTIS’S HOUSE
Climb up the
stairs, and leave the house through the door on the left.
~~~~~~~~~~~~~~~~~~~~~~~~~~~~~~~~~~~~~~
MERILOFT
~~~~~~~~~~~~~~~~~~~~~~~~~~~~~~~~~~~~~~
CLOUD VILLAGE
F’ther and Harm’ny
Lightbeard have gone. Walk right to the next screen.
This is the centre
of the Cloud Village. Climb up the ladder in the background, so you are
in the bird’s nest.
Don’t touch the
bird’s egg! Walk left to the next screen.
Watch the cut scene
with the Dead Eye Druids worshipping the peach tree. Now walk left
towards the Druids (watch out for the holes in the clouds), talk to them, and
work through all the dialogue. When conversation is over, click on the
tree, and you’ll slide down to the screen below.
At the base of the
tree, walk left a few steps, and take a PEACH from the
pile. Resist the temptation to eat it. Talk to Gus and work through
all the dialogue. He gives you his FRUIT TAPPER, that allows
you to get the juice from fruits. Now click on the hole in the tree to
climb back up to where the Dead Eye Druids are.
Walk right to the
next screen.
You’re in the
bird’s nest. Look at the egg that Jessie, the bird, is holding, and
notice that it’s starting to crack. If Jessie scares you away, simply
climb back up the ladder. Now, you want to help that little chick
hatch. Use FRUIT TAPPER with the egg - awww, what a cute
little chick. Jessie is initially angry with you, thinking you are trying
to harm her egg. But as soon as she sees her chick, she’s thrilled, and
devotes all her attention to the chick. Climb down the ladder next to the
bird’s nest, and pick up BIRD SHELL at the bottom of the
ladder. Walk right to the Cloud Shoes hut. Talk to Husker and Walt’r
and work through all the dialogue. When you’re ready, climb down the
stairs to leave the hut.
Walk right to the
next screen.
Rocky (Vella’s
younger sister) is here, along with M’ggie. Talk to them. They’re
selling cupcakes in order to start a Fundraiser Campaign about the Maiden’s
Feast. You’re happy to support their Fundraiser, but you don’t have money
to buy a cupcake. Walk up to the next screen.
Vella’s Grandfather
is teaching Ch’t how to fight. Talk to Vella’s grandfather and work through
all the dialogue. Ch’t gives you some MONEY, while Vella’s
grandfather realises that he is almost out of cupcake frosting. Leave
Grandfather and Ch’t, and walk back down one screen.
Walk down a few
steps. Rocky and M’ggie are still selling their CUPCAKES.
Give MONEY to them, and they give you a VELLA CUPCAKE.
Walk left to the next screen.
Walk up to the
Cloud Shoes hut.
Give VELLA
CUPCAKE to Husker and Walt’r. Walt’r licks the frosting on the
cupcake, so you’re left with a CUPCAKE WITHOUT FROSTING.
You’ll have to re-frost it. Walk down the stairs to leave the Cloud Shoes
hut.
Walk right to the
next screen.
Head up to where
Vella’s Grandfather and Ch’t are practising fighting techniques.
Give CUPCAKE
WITHOUT FROSTING to Vella’s Grandfather. He immediately
re-frosts it… but now he’s completely run out of frosting. You give him
the CUPCAKE, and he gives you his CANE in
return. Walk down one screen.
Walk left to the
next screen.
This is the centre
of the village. Walk left a few steps, then climb up the ladder at the
back, so you’re in the bird’s nest. Walk left, past the nest, and left to
the next screen.
The Dead Eye Druids
are still here. Walk left a few steps (be careful of the holes in the
clouds), and talk to the Druids. Use CANE with the
Druids, to fight with them. After attacking you, they confess to each
other that they are not really blind, and they don’t really want to be Dead Eye
Druids. After that grand revelation, they jump through the clouds to
begin a new life, leaving their ROBES behind. Pick up
the ROBES. Now walk right to the next screen.
Climb down the
ladder next to the bird’s nest. Walk down a few steps, and climb down the
ladder at the front of the screen.
Harm’ny Lightbeard
is here, but he’s locked in a cage. Talk to him a few times to learn that
everyone has turned on him. Talk to Vella’s mother and Twyla, and work
through all the dialogue. When you have the chance, make sure you use the
following dialogue options with Twyla.
- Well, at least your costume is
cool.
- Do you think you could make me a
costume?
It turns out that
Twyla is an excellent seamstress, and she agrees to make you a costume if you
give her a pattern and some material. No problem. Give her
the ROBES you got from the Dead Eye Druids, and give her
the BABY RADIATION SUIT. She immediately gets to work, and in
no time at all, she gives you a FEATHERY RADIATION SUIT. Now
climb up the ladder on the left.
You’re at the
centre of the village again. Walk left one screen.
This is where you
first met F’ther and Harm’ny Lightbeard. Climb down the ladder on the
left, back down to Shellmound.
~~~~~~~~~~~~~~~~~~~~~~~~~~~~~~~~~~~~~~
SHELLMOUND
~~~~~~~~~~~~~~~~~~~~~~~~~~~~~~~~~~~~~~
CURTIS’S HOUSE
Climb down the
stairs in Curtis’s house, then leave the house through the door on the
right.
Walk down to the
path in the foreground, then go right to the talking tree.
Notice the FISH
PLAQUE in the tree - this is the same FISH PLAQUE that
fell from Harm’ny Lightbeard’s cloud. Pity you can’t reach it. Talk
to the tree - he refuses to give you the FISH PLAQUE, unless it
falls from the branches naturally. Okay, let’s make it fall, then.
Choose any dialogue option to tell a joke to the tree. Unfortunately, the
tree doesn’t find it very funny. Keep telling jokes to the tree, until
you can use the following dialogue options (it might take several attempts
before these options show up).
- What‘s the smallest full-grown tree you
ever heard of?
- I’ve seen one no bigger than my
hand.
- A Palm Tree.
The tree will laugh
at this joke, causing the FISH PLAQUE to fall from his branches.
Pick up the FISH PLAQUE. Walk right to the beach.
BEACH
Talk to Carol,
who’s still trying to make some hooks. Show her the FISH PLAQUE,
and she’ll think you caught it. Give her the CROCHET HOOK,
then use the following dialogue option.
- But please promise to leave SOME fish in
the ocean for future generations.
Carol gives you
her SPOOL OF WIRE, since she won’t need it anymore. Talk to
your dad and work through all the dialogue. He’s trying to get the PH
balance right in his Hull Patch Sealant mixture - it has to be exactly 7.
Use SPOON with the Hull Patch Sealant to learn that the PH
level is 0! Drop EGG SHELLS into the Sealant mixture 3
times, to raise the PH level to 9. Now drop your PEACH into
the Sealant mixture to lower the PH level to 7. If necessary, use EGG
SHELLS again to raise the PH level by 3, or use PEACH again
to lower to PH level by 2. When you have the correct level, watch the cut
scene, as you and your dad return to Alex‘s ship.
DEAD EYE PYRAMID
CAVE \ ALEX’S SHIP
Your dad will show
his Sealant mixture to Alex, and starts exploring the ship so he can patch it
up. Give FEATHER RADIATION SUIT to Alex. If you
haven’t done so already, give GYROSCOPIC HYPERCAM to
Alex. Show your HEXIPAL CREATURE to Alex, and Alex will
comment that the HEXIPAL CREATURE needs re-wiring.
Give PITCH PIPE to Alex, and he’ll play the ‘Previous
Destination Song’ for you. The notes are Mid Note, Mid Note, High Note,
Low Note, Mid Note. This information will needed to complete a puzzle on
Vella‘s journey. Look at the diamond shape device on the left, next to
the door. That device is a Recharging Station, used for charging up
Diamond Droogs.
Now remember, Alex
said that HEXIPAL needs re-wiring. In your Inventory,
combine SPOOL OF WIRE with the HEXIPAL CREATURE.
Look at the HEXIPAL CREATURE. This puzzle is rather
confusing, and very frustrating. To make matters worse, it’s random, so
it changes with every play through. The clue to knowing how to re-wire it
lies with Vella’s part of the story. For reference, look at the photo in
the Control Room, of Shay with his parents, and pay special attention to the
strange symbols on the left edge.

Look at Hexipal
again. Note the contact points going around the edge of the HEXIPAL,
and notice that the wires are always placed as blue first, yellow next, and red
last. Click on the contact points to place the wires. The correct
coloured wires must be on the correct contact points. The direction of
the wire is also important. For example, 1 - 2 is not the same as 2 -
1. For my play through, I clicked on the contact points in this
order.

Exit the close-up. Now, to check if your Hexipal is correctly
wired, place HEXIPAL in the diamond shape Recharging Station
next to the door, and compare the symbols that appear with the symbols in
Shay‘s family photo. If wired correctly, you’ll get the following
message.
- I have a good feeling about that
pattern.
Your little HEXIPAL buddy will spring to life.
Now give HEXIPAL to Alex to help him repair the damaged
electronics.
Watch the cut scene
with the Mog Chothras.
Click here to continue Vella’s journey…
Otherwise, click here for the final part…
No comments:
Post a Comment