
YEAR: 1996
GENRE: FMV Graphic Adventure
WHERE TO GET IT: GOG
============================================================
BOULEVARD OF BROKEN DREAMS (THE BAD PATH)
GAME PLAYER LEVEL
PART 1
============================================================
~~~~~~~~~~~~~~~~~~~~~~~~~~~~~~~~~~~~~~
DAY ONE: THE
SEARCH FOR MALLOY
~~~~~~~~~~~~~~~~~~~~~~~~~~~~~~~~~~~~~~
TEX’S BEDROOM
After a long intro,
the game begins in your bedroom. You’ve been hired by a man called Gordon
Fitzpatrick, who’s looking for his missing friend, Dr Thomas Malloy.
Fitzpatrick has already been to the university Malloy used to work at, but it
seems that nobody has ever heard of him. Maybe you’ll have some luck in
tracking him down?
Examine all the
items in your Inventory - you get Fitzpatrick’s vid phone number, which you can
use later. Explore the bedroom. Nothing much to do in here.
When you’re ready, head through to the Rec Room.
TEX’S REC ROOM \
COMPUTER ROOM
Explore the Rec
Room. Take MAC MALDEN CLIPPING from the shelf unit, and
look at it in your Inventory. Look at the computer computers on the shelf
unit, and look for the laptop computer. Turn on the computer. Dang,
it needs a CD. When you’re ready, go back through to your bedroom.
TEX’S BEDROOM
Go to your
office.
TEX’S OFFICE
Explore your
office. Look at can of dog food on the table behind your desk. Pick
up JACKKNIFE from the table behind your desk, next to the dog
food. Look at the photo of your ex-wife on your desk. Look at vid
phone on your desk, and use it to call Fitzpatrick. Ask About
everything. When conversation is over, hang up your vid phone. Open
top left desk drawer and take ELECTRONICS SHOP BILL. When
you’re ready, go out through the front door, down to Chandler Avenue.
CHANDLER AVENUE
Talk to Chelsee
behind the News Stand. You want to apologise to her for last night.
You also want to win her heart, cos you’ve had a crush on her for years.
Use the following Responses.
C. Pretend nothing‘s wrong.
A. Out of touch with feminine side.
End conversation
here. Immediately talk to her again, using the following Responses.
B. Sly invitation to dinner.
C. Play down the ‘date’ aspect.
B. Suggest a favourite hot spot.
You have a date
with Chelsee! Yippee! She’s invited you over for dinner this
evening. Head back over to the Ritz Hotel.
RITZ HOTEL - LOBBY
Nilo, who runs the
Ritz, is a nasty piece of work. Talk to him, using the following
option.
C. Hint at violence.
Give Nilo CASH from
your Inventory, and offer £21,00 to pay back your debt to him. Now use
the following dialogue options with him.
B. Test Nilo’s photographic memory.
A. Tourist approach.
A. Offer £100
Ask About
everything. End conversation.
Since you’ve paid
your debt to Nilo, you can enter through the front door freely, without
worrying. Now let’s explore the lobby. Look at CROSSWORD
PUZZLE on the settee, and pick up the CROSSWORD PUZZLE.
Look at it in your inventory to get a close-up view of it. Let’s complete
it. When finished, it will look like this.
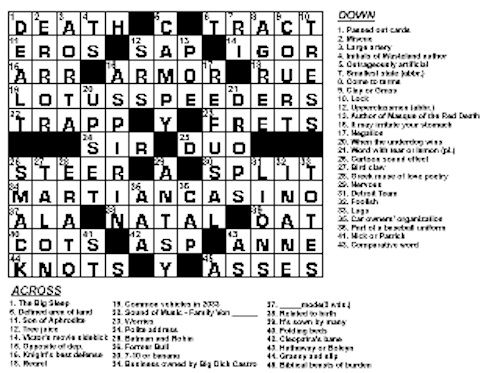
Post FINISHED
CROSSWORD PUZZLE into the mail drop box next to the front door.
Look at the vending machine, and move the vending machine to get the
sandwich. Yuck! It’s all mouldy! Go through the door next to
Nilo, into the stairs and corridors.
RITZ HOTEL - STAIRS
AND CORRIDORS
Climb up stairs to
the First Floor.
Nilo told you that
Malloy stayed in Apartment A. Look at Door A, and try to enter - it’s all
locked up. Look at keypad next to Door A. Nilo ‘conveniently’
forgot to tell you the code. Go back down stairs to the Ground
Floor.
Go to the Lobby
area.
RITZ HOTEL - LOBBY
Talk to Nilo again,
and use the following options.
C. Really, really annoyed.
C. Refuse assertively.
Ask About code for
Apartment A. The code is 4827. End conversation.
Go through the door
next to Nilo, into the stairs and corridors.
RITZ HOTEL - STAIRS
AND CORRIDORS
Climb up stairs to
the First Floor.
Look at Door A, and
look at keypad next to the door. Enter code 4827. Now enter
Apartment A.
RITZ HOTEL -
APARTMENT A
Watch the cut
scene. You get whacked! Ouch!
~~~~~~~~~~~~~~~~~~~~~~~~~~~~~~~~~~~~~~
DAY TWO:
LADIES IN WAITING
~~~~~~~~~~~~~~~~~~~~~~~~~~~~~~~~~~~~~~
RITZ HOTEL -
APARTMENT A
You wake up hours
later. Well, since someone went to the bother of knocking you out, you
must be on the right track. Explore the room.
Look at the grey
desk, and search the desk drawers to find CHILD PHOTO, AIR
MAIL ENVELOPE, and ACME BUSINESS CARD. Look at CHILD
PHOTO in your Inventory to get the name Regan. Look at AIR
MAIL ENVELOPE in your Inventory to find UNTRANSLATED LETTER.
Look at UNTRANSLATED LETTER in your Inventory to realise that
it’s written in some weird language you’re not familiar with. Look
at ACME BUSINESS CARD in your Inventory - it’s for a nearby
warehouse. Malloy must have stored something in there.
Look at chair in
the corner. Move cushion from the chair, and pick up PHOTO OF
MALLOY & LLAMA. Look at PHOTO OF MALLOY & LLAMA in
your Inventory.
Look at the
cardboard boxes next to the wall. Open box, and pick up AIRPORT
OF THE GODS BOOK.
Look at nightstand
in the corner, and take MALLOY’S LETTER from on top of the
nightstand. Look at MALLOY’S LETTER in your Inventory to
learn that someone called David Wright owns a cabin in Oregon. Open
drawer of the nightstand, and take PAWN TICKET.
Look at bed, look
at SCARF on the bed, and take the SCARF.
Look at SCARF in your Inventory - it’s pretty
distinctive. When you’re ready, leave the room.
RITZ HOTEL - STAIRS
AND CORRIDORS
WOW! You’ve
been out for 16 hours! You missed your date with Chelsee!
Damn! Oh well, these things can’t be helped. Return to your office
in the Ritz Hotel.
TEX’S OFFICE
Look at MAIL that
came through the front door. Pick up MAIL, and look at it in
your Inventory. It contains CASH. You won that
crossword competition from the lobby. Now leave your office, and go
outside to Chandler Avenue.
CHANDLER AVENUE
Now let’s explore
the area. Note that Chelsee isn’t at her News Stand. Look carefully
on the road, near the Electronics Shop, and pick up NILO’S WALLET.
Look at NILO’S WALLET in your Inventory to see that it’s full
of cash. Well, if Nilo’s stupid enough to drop it in the first place, he
doesn’t deserve to get it back. And you know what they say, Tex… Finders
Keepers! You should keep the wallet.
Head up towards
Golden Gate Hotel. Look at the pavement next to the mailbox, and pick
up ORPHANAGE LETTER from the pavement. Examine ORPHANAGE
LETTER in your Inventory. Wow, it has £500! This is easy
money! Keep it! It will help to pay off some of your debts.
Look for the Acme
Warehouse. Try to enter, but it’s all locked up. Look carefully at
the road next to the warehouse door, and notice the hole in the road.
Climb down through the hole, into the sewers.
SEWERS
Look at boxes on
the ground. Look for one on the right, that you can open. Open it
and take CHISEL. Walk forward a few steps, then turn
left. Follow the sewer along to the end. Look for another crate on
the left. Move crate, and take MONEY BELT that was
hidden underneath. Examine MONEY BELT in your Inventory
to find £300. This is your lucky day! Now climb up the ladder.
You find yourself in the alley behind Rook’s Pawn Shop. Enter the Pawn
Shop.
ROOK’S PAWN SHOP
As soon as you
enter the shop, Rook starts talking to you. Use the following
Responses.
C. Tell Rook your personal nightmare.
C. Rub Rook’s nose in it.
A. Offer a bet.
C. Ask for an extension.
C. Show no mercy.
A. Exit to Chandler Avenue.
You automatically
leave the Pawn Shop.
CHANDLER AVENUE
Enter Rook’s Pawn
Shop again.
ROOK’S PAWN SHOP
Talk to Rook again,
using the following options.
A. Pay Rook £300.
Ask About
everything. Now give him RECEIPT FROM PAWNSHOP from your
Inventory. He knows that the receipt doesn’t belong to you, so he wants
to charge extra before you can redeem it. Choose the following
option.
A. Pay Rook £250
He gives you
a BLACK DAGGER. Look at it in your Inventory. What a strange
thing for Malloy to pawn. Now end conversation, and exit to the
alley.
ALLEY BEHIND ROOK’S
PAWN SHOP
Look for the wooden
fence. Climb through the wooden fence, back to Chandler Avenue.
CHANDLER AVENUE
Look for Rusty’s
Fun House. Try to enter it, but the cops put one of those computerised
locks on the door.
Look for the Brew
& Stew Diner, and enter it.
BREW & STEW
Louie, who runs the
diner, is a lovely guy, and he’s your best friend, Tex. Talk to him and
use the following Responses.
B. Play down the case.
B. Won‘t eat it.
A. No thanks.
Offer Louie
the UNTRANSLATED LETTER from your Inventory. He tells
you that it’s written in Yukatec. No wonder you couldn’t understand
it. Louie can’t translate it, but he suggest you find Clint, and ask him
for help. Offer SCARF from your Inventory. Louie
remembers that it belongs to a young blonde woman who came in a while
ago. Now Ask About everything. You get some useful information from
Louie. End conversation, and leave the diner.
CHANDLER AVENUE
Notice the wooden
fence at this end of the street. Follow the fence down towards the old
Slice O Heaven (which is now closed), and walk up the side of Slice O
Heaven. Notice the grey Exit door at end of the street. Open door,
and enter the abandoned storage area.
ABANDONED STORAGE
AREA
Climb up the
stairs, and walk to the end of the corridor. Move the box that’s next to
the bin. Open the box that was underneath. Take BOTTLE OF
SCOTCH from the box. Now leave this storage area, and return to
Chandler Avenue.
CHANDLER AVENUE
Look for the
Electronics Shop and enter it.
ELECTRONICS SHOP
The shop has a new
owner - Zack Williams. Watch the cut scene as Zack zaps your electronics
shop credit card. I guess you don’t have credit here anymore. Talk
to Zack, and use the following options.
C. Play innocent.
B. Comment on the selection of wares.
A. Ask for the former owner.
C. Attempt intimidation.
Talk to Zack again,
using the following option.
B. Pay Zack £1230
You’ve paid off
your bill… reluctantly! Look at all the items on the counter, and behind
the counter. Talk to Zack again, and Ask About everything.
Buy VISUAL ANALYZING APPARATUS. Buy ROBCO BATTERY
PACK. Now end conversation.
Leave the
shop.
CHANDLER AVENUE
Remember Louie told
you to find Clint, and ask him for help in translating your letter? Let’s
go and find Clint then. Head up towards Golden Gate Hotel. Turn
left, and look at the Clint’s Cocoa Cabana sign on the wooden fence. Enter
through the wooden fence to find Clint.
CLINT’S COCOA
CABANA \ COIT TOWER
Talk to Clint using
the following options.
A. Bring up Clint‘s past misfortunes.
C. Suspicious.
A. A little-known scientific fact.
C. Ignore the threat.
B. Accuse Clint of skimming.
B. Cash in an old favour.
Poor Clint!
Ask About everything. He’s unable to translate the letter for you.
But he DOES tell you about the Fuchsia Flamingo Club, which is run by someone
called Gus Leach. He gives you LEACH’S KEY, and asks you to
return it to Gus. End conversation, and return to Chandler Avenue.
CHANDLER AVENUE
Look for the
Fuchsia Flamingo club, and look for the delivery entrance gate at the
side. Enter through the gate, so you’re in the alley behind Fuchsia
Flamingo.
ALLEY BEHIND
FUCHSIA FLAMINGO
Follow the alley
round to the back door. Explore the alley. Take ANTENNA from
the bin next to the door. Examine it in your Inventory to get EXTENDED
ANTENNA. SAVE YOUR GAME HERE. Now use LEACH’S
KEY on the back door, and enter the Fuchsia Flamingo.
FUCHSIA FLAMINGO
Talk to Gus using
the following options.
B. Curious and rude.
C. Incredulous and rude.
C. Threaten with violence.
A. Let him in on your new aftershave.
B. Show the scarf.
B. Hairdresser humour.
You automatically
leave the club. Travel to Chelsee’s apartment, and see if she’s home
yet.
CHELSEE’S APARTMENT
Chelsee’s
understandably upset with you. Talk to her using the following
options.
A. Fake a misunderstanding.
C. My way… or the highway.
A. Slightly offended.
C. Fairly apathetic.
C. Manly and thirsty.
Chelsee agrees to
go for a drink with you at the Fuchsia Flamingo.
FUCHSIA FLAMINGO
You both sit down
together. Talk to her using the following options.
B. Thumbs down.
A. Smug, insensitive bag of hormones.
B. Cut to the chase.
B. Recognise key to Chelsee’s heart.
Watch the cut scene
as Lucy Love, AKA Emily, dances. You begin to pay too much attention to
Lucy\Emily and start ignoring Chelsee. Chelsee is understandably hurt and
angry with you! You begin to argue with her, and she storms out!
Then you get very, VERY drunk! You sneak up to Lucy\Emily’s room.
You’re a mean drunk, Tex! She confides in you that she thinks someone is
trying to kill her, and she’s terrified! She begs you to help her, and
she gives you the threatening letter that was sent to her. Unfortunately,
she tore it up in a panic, so now it’s just EMILY’S NOTE SCRAPS.
Gus comes up to check on Emily, and throws you out of the club.
~~~~~~~~~~~~~~~~~~~~~~~~~~~~~~~~~~~~~~
DAY THREE:
THE BLACK ARROW KILLER
~~~~~~~~~~~~~~~~~~~~~~~~~~~~~~~~~~~~~~
TEX’S OFFICE
You wake up in your
office with a killer hangover. You only remember fragments of last night,
but you think you talked to Emily, and you think she gave you something.
A note, maybe? Examine EMILY’S NOTE SCRAPS in your
Inventory, and assemble it to read the message. When finished, it will
look like this.

Examine EMILY’S
THREATENING NOTE in your Inventory. Yikes! No wonder Emily
was so spooked about it. When you’re ready, leave your office, and go
outside to Chandler Avenue.
CHANDLER AVENUE
Walk up towards
Golden Gate Hotel. To the left of the hotel, there is a wooden
gate. Go through the wooden gate, into the Golden Gate Hotel alley.
GOLDEN GATE HOTEL
ALLEY
Crazy Gary is here,
giving a sermon to no-one in particular. Talk to Crazy Gary using the
following options.
C. A doggie joke.
B. Discuss lunch.
B. The real problem.
B. Official Beverage of Private Investigation.
A. Suggest a pact.
End
conversation. Talk to Crazy Gary again, using the following option.
A. Make a donation.
Give him BOTTLE
OF SCOTCH from your Inventory. Ask About everything. He
gives you MALLOY’S KEY, which he acquired after Malloy accidentally
dropped it in the street. Now End conversation and return to Chandler
Avenue.
CHANDLER AVENUE
Head up towards
Acme Warehouse. Try to enter it, but it’s locked. That’s no problem
- use MALLOY’S KEY in the warehouse door to unlock it.
Now enter the warehouse.
ACME WAREHOUSE
Explore the
warehouse. Look at crate on the right - this is Thomas Malloy’s
crate. You’ll need to move it out of that small corner before you can
open it. Look up at the ceiling, and notice the sliding pulley.
Look for the pirates chest opposite the door. Open pirates chest and take
the PEG LEG. Now look at Control Box on the wall at the far
end of the warehouse. Open Control Box and turn on the pulley
system. Lower the pulley. Go back to Malloy’s crate, and notice
that the pulley now matches up with Malloy’s crate. Use PEG
LEG on the pulley to secure it. Go back to the Control Box and
raise the pulley. Now walk back to Malloy’s crate, and pick up MAP
OF ASIA that was below Malloy’s crate. Take PHOTOGRAPH
OF NAZCA from Malloy’s crate. Also get MALLOY’S
TAPESTRY from the crate. Look at both items in your
Inventory. Now leave the warehouse.
CHANDLER AVENUE
It’s about time you
visited your old pal Mac Malden. Travel to the Police Station in the San
Francisco Map.
POLICE STATION
Talk to Mac using
the following options.
C. Comment on Mac‘s new look.
A. Mention the Mrs.
A. Get a name.
C. Delve into Mac’s psyche.
C. Aggressively looking for help.
Ask About
everything. He gives you KEY TO RUSTY’S. You also know
about the Black Arrow Killer now. End conversation, and return to
Chandler Avenue.
CHANDLER AVENUE
Look for Rusty’s
Fun House. Use KEY TO RUSTY’S on the door to get a
close-up view of the CopLock. You have to match up 4 nodes on the left,
with 4 nodes on the right. They match up like so.

Now enter Rusty’s
Fun House.
RUSTY’S FUN HOUSE
Explore the Fun
House and the Employees Only Back Room. Go behind the counter, and move
lever on the floor to open a secret door. Walk through the door, into the
secret room.
Move newspaper on
the floor, and pick up the ‘fake’ doggie poo. Ewwww YUCK! Climb
ladder up to the roof.
On the Fun House
roof, look at Water Tower. Climb up the ladder to the water tower - damn,
it’s locked. Note that you have access to other roofs from here.
That’s useful information to know for later. For now, return to Chandler
Avenue.
CHANDLER AVENUE
Let’s pay Rook
another visit. Go to Rook’s Pawn Shop.
ROOK’S PAWN SHOP
Talk to Rook using
the following option.
C. Defend your privacy with a warning.
Now ask Rook about
the Yukatec Language, then use the following option.
A. Pay Rook £30.
He sells you YUKATEC
MADE EASY BOOK. Ask About everything. Now end the conversation,
and exit to Chandler Avenue.
CHANDLER AVENUE
In your Inventory,
combine YUKATEC MADE EASY BOOK with UNTRANSLATED
LETTER, then examine TRANSLATED YUKATEC LETTER. Finally,
you can read the letter! It’s from Oliver Edsen, and it’s talking about
the Mayan calendar, and hieroglyphics. Now, remember how we learned that
David Wright owns a cabin in Oregan? It’s time to visit that cabin.
Travel to the cabin in the North America Map.
DAVID WRIGHT’S
CABIN
Well, the cabin is
certainly remote! Explore the cabin. Look at sheets of paper on the
floor next to the bookcase, and move them to see the blood splatters.
Look at table in middle of the room, and take CD FROM CABIN from
the open drawer. Pick up CRUMPLED PAGE on the floor near
the tree. Examine CRUMPLED PAGE in your Inventory to see
a ‘Puzzle Of The Month’ page. You can’t solve it yet, though. Climb
up stairs to the 1st Floor.
Try to open door at
top of the stairs. Hmmm, their doesn’t seem any way to open it. How
strange! Wait a minute… look at painting next to the door, and move the
painting. Ah-ha! A security keypad. Whatever’s behind this
door must be important! Try pressing a few buttons on the keypad if you
want, but without knowing the code, you’re not going to get in. When
you’re ready, travel back to your Computer Room in the Ritz Hotel.
TEX’S REC ROOM \
COMPUTER ROOM
Use CD FROM
CABIN in the laptop. Hmmm, you see a 4x4 square, with lots of
coloured cubes that have to fit in the square. Does this look familiar at
all? What about the ‘Puzzle Of The Month’ page you found in David
Wright’s cabin? Use that to solve the puzzle here. When completed,
it will look like this.

Take note of the
highlighted squares - they’re actually the code to the door in the cabin.
Click on ‘Next’ to read all the info, then exit the laptop close-up.
Travel back to David Wright’s cabin in the North America Map.
DAVID WRIGHT’S
CABIN
Climb up stairs to
the 1st Floor. Move keypad, and enter the code as so.

The door now opens,
so enter the locked room.
Look at projector
on the desk, and map on the wall. Look carefully at the floor, and move
the floorboards. GULP! That must be David Wright. And from
the look of things, he must have been here for quite some time! Poor
David! Look at the bookcase, open bookcase doors, and take 16MM
REEL OF FILM. Look at movie screen next to the book-case, and pull it
down so it covers the wall. Turn around and use 16MM REEL OF FILM with
the projector, then turn projector on. Watch a film about the Roswell
Aliens. Well, you’ve had enough of this cabin! Time to get out of
here. Travel back to Chandler Avenue.
CHANDLER AVENUE
You could do with
seeing a friendly face. Enter Brew & Stew.
BREW & STEW
Talk to Louie using
the following options.
A. Nuptial worries.
C. Describe your ideal.
Ask About
everything. Now end the conversation.
CHANDLER AVENUE
Louis told you that
Rook recycles his old copies of The Bay City Mirror newspaper in the recycle
bin in the alley behind his shop. Head over to the alley now.
ALLEY BEHIND ROOK’S
PAWNSHOP
Look for the
recycle bin near Rook‘s back door. Open bin, and take Bay City
Mirror OLD NEWSPAPER. Examine OLD NEWSPAPER in
your Inventory, and read The Black Arrow Killer article by Lucia Pernell.
You can read the other articles too, if you like. When you’re ready,
enter Rook’s Pawn Shop.
ROOK’S PAWN SHOP
Talk to Rook and
ask about Lucia Pernell. He gives you PERNELL’S BUSINESS CARD.
Now end the conversation and exit to Chandler Avenue.
CHANDLER AVENUE
Go up to your
office in the Ritz Hotel.
TEX’S OFFICE
Examine PERNELL’S
BUSINESS CARD in your Inventory to get Lucia’s number. Use your
vid phone to dial Lucia Pernell. Talk to her using the following
options.
A. A feeble pun.
C. Manly PI response.
She hangs up on
you. Call her again, and use the following options.
B. Refer to your client’s note.
C. Eager to meet.
She agrees to meet
with you. Go to the Brew & Stew.
BREW & STEW
Lucia is waiting
for you in the diner. Watch the cut scene as you as Lucia discuss the
Black Arrow Killer and NSA involvement. She also tells you to check out a
company called AutoTech.
TEX’S OFFICE
You automatically
return to your office to mull things over. As you do so, you see someone
at the water tower on the roof of Rusty’s Fun House. Maybe Emily wasn’t
imagining things, when she told you that someone was trying to kill her. Head
on over to Rusty’s roof now.
RUSTY’S FUN HOUSE -
ROOF
Pick up JACKET that
someone left on the air conditioning unit. Examine JACKET in
your Inventory to find CUFFLINK and PHOTOGRAPH SCRAPS.
Look at CUFFLINK in your Inventory to get the initials
‘D.H.’ Examine PHOTOGRAPH SCRAPS in your
Inventory. This is another jigsaw puzzle you have to assemble. When
it’s assembled, it will look like this.

Now look at the ASSEMBLED PHOTOGRAPH in your Inventory
- it’s the exterior of AutoTech. You just have to figure out where it is,
now. In your Inventory, combine ASSEMBLED PHOTOGRAPH with
the VISUAL ANALYZING APPARATUS. Now in your Inventory,
examine V.A.A. AND PHOTOGRAPH to start analyzing the photo,
and find an address. Turn on the VISUAL ANALYZING APPARATUS.
Zoom in on street sign on the left - Barcelona. Zoom in on number on the
door - 144. So AutoTech is located at 144 Barcelona. Now turn off
the VISUAL ANALYIZING APARATUS. Before going there, return to
your office in Ritz Hotel first.
TEX’S OFFICE
Use your Vid
Phone. Dial Gordon Fitzpatrick and Ask About everything. Dial Lucia
Pernell and Ask About everything. Now Lucia mentioned Sandra
Collins. This would be a good time to visit Sandra Collins house.
So travel to Sandra Collins house in the San Francisco Map.
SANDRA COLLINS HOUSE
Explore the room. Open drawer in the bedside table and take
the RESUME. Look carefully on the floor next to the sewing
table, and take AUTOTECH SECURITY CARD from the floor.
It’s hard to spot, but it’s there. When you’re ready, travel to AutoTech
in the San Francisco Map.
AUTOTECH - LOBBY
Explore the lobby. Take HAIR BRUSH from the
table. Take VISTOR’S PASS from the floor between the 2
hard chairs. Look at VISITOR’S PASS in your Inventory to
see that it’s #14. Take CURTAIN CORD from door on the
right. Open the glass window at the Reception Area, and look into the
Reception Area to see CLIPBOARD on the desk. Try to get
the CLIPBOARD, but you can’t reach it. In your Inventory,
combine HAIR BRUSH with CURTAIN CORD, then
use BRUSH WITH CORD (basically, a make-shift grappling hook)
on the CLIPBOARD. You’ve now successfully acquired the CLIPBOARD.
Look at CLIPBOARD in your Inventory to see the passcodes for
every Visitor’s Pass. You’re card is #14, so the passcode is 8338.
Walk to the corridor with the scanner in the wall. SAVE YOUR GAME
HERE. Use VISITOR’S PASS with the scanner, then
enter the code 8338. Now go through door into the Hallway.
AUTOTECH - HALLWAY
SAVE YOUR GAME HERE. Now you have to deal with the security guard
before doing anything else, or you will be caught.
Turn left, and look for the storage cupboard at end of the
hallway. Open door and enter the storage cupboard. Take BOX
OF SOAP from the top shelf. Look to your left and take the MOP.
Turn around and walk forward a few steps. Look at the mop bucket.
Pour BOX OF SOAP into the mop bucket, then use MOP with
the mop bucket. You start mopping the floor, making it VERY
slippery. When you’ve finished mopping, open Fire Exit door next to the
mop bucket. This sounds an alarm. Quickly hide in the storage
cupboard, closing the door from inside. Raise yourself up (press Left
Shift) to look out the small window. The security guard will rush out to
see what set the alarm off, and slip on the wet floor. You stuff him into
the storage cupboard. Now you can explore AutoTech at your leisure.
Look for the door
to Dag Horton’s office, and enter it.
AUTOTECH - DAG HORTON’S OFFICE
Look at picture of Dag Horton & an unknown man on wall behind the
desk. So now you know what Dag looks like. Look at book on the
desk, and then move the book. Pick up STICKY NOTES that
were hidden underneath the book. Look at STICKY NOTES in
your Inventory - is Gary Lee and Crazy Gary, one and the same person?
You’ll have to find that out, once you get out of here. Look at the desk,
open bottom desk drawer of the desk, and take NECKLACE. Look
at NECKLACE in your Inventory to see the initials ‘S.C’.
Sandra Collins, maybe? Open music CD player on the desk, and pick
up FILE CABINET KEY. Use FILE CABINET KEY to
unlock the file cabinet on the right, and open bottom right drawer.
Take MATCHBOOK TIN from the drawer. Examine MATCHBOOK
TIN in your Inventory to find some VERY creepy photos of Emily, along
with another woman. So someone has definitely been spying on Emily.
Now look at bookcase next to the door, and take PAD-LOCK KEY from
on top of the bookcase. Press Left Shift to raise yourself if
necessary. When you’re ready, leave the office.
AUTOTECH - HALLWAY
Leave AutoTech, and
travel back to Brew & Stew in Chandler Avenue.
BREW & STEW
Talk to Louie using
the option.
B. Not your type.
Now Ask About Gary
Lee. End conversation, and exit to Chandler Avenue.
CHANDLER AVENUE
SAVE YOUR GAME HERE. Go to the alley behind Golden Gate
Hotel.
GOLDEN GATE HOTEL ALLEY
Talk to Crazy Gary
and Ask About everything. When asking about the roof of Rusty’s Fun
House, note that he tells you he saw a light coming from the water tower only
minutes ago. End conversation, and rush up to the roof of Rusty’s Fun
House.
RUSTY’S FUN HOUSE - ROOF
SAVE YOUR GAME HERE. Climb up ladder to the water tower.
Since you have the padlock key from Dag Horton’s office, you automatically
enter the water tower. Look to your left, and turn on the viewing
device. Watch the cut scene as you realise the danger Emily is in.
You rush over to the Fuchsia Flamingo… only to be stopped by Gus Leach.
He doesn’t believe your story that Emily is in danger. And because of
this delay… you don’t get to Emily in time. The attacker kills her.
He steals a box from Emily’s room, before jumping out the window. But you
can’t let him escape now, after he so brutally murdered poor Emily. Maybe
you can still catch him. Go to Rook’s Pawn Shop.
ROOK’S PAWN SHOP
After a frantic
conversation with Rook, he tells you that he heard a noise up on his
roof. Exit to Chandler Avenue.
CHANDLER AVENUE
Travel up to the
roof of Rusty’s Fun House.
RUSTY’S FUN HOUSE - ROOF
SAVE YOUR GAME HERE. Look at the attacker on the next roof -
Rook’s roof. You have to sneak up on him without him seeing you.
Crouch down low (press Ctrl to duck, and Left Shift to raise yourself up
again), then quickly climb over the steps to Rook’s roof. Duck down behind
the air conditioning unit. Slowly raise yourself, until you can see the
attacker. Now when he’s facing away from you, rush straight towards
him. After a brutal struggle, the attacker trips, falls off the roof, and
plunges to his death. He’s not gonna hurt any more women! You go
down to unmask him. Yep! Just as you suspected, it’s Dag
Horton.
No comments:
Post a Comment