
YEAR: 2022
GENRE: Point & Click Adventure
WHERE TO GET IT: GOG
===========================================================
PART 2
===========================================================
~~~~~~~~~~~~~~~~~~~~~~~~~~~~~~~~~~~~~~
STEFAN
~~~~~~~~~~~~~~~~~~~~~~~~~~~~~~~~~~~~~~
SLUG’S BAR
Your captor leaves you sitting at the
bar, while she goes to talk with the boss.
Talk to the Barman and work through all the dialogue with him - he
refers to the strange woman as The Keeper.
The Keeper joins in your conversation, so work through all the dialogue
with her. When conversation is over,
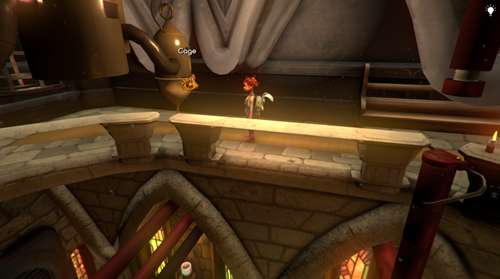
look at the SCOOP that’s hanging from the ceiling, in front of the
bar.

Take the SCOOP. Explore the bar. Look at all the paintings on the back
wall. Look at Janis, who is lying down
on the settee.

Look at the table in the middle of the
room. Talk to Keeper again (the strange
woman) and work through all the dialogue with her. It seems like she needs your help to save
someone, but she’s afraid that The Eye will overhear her. It’s all very mysterious! Go back to the Barman, talk to him, and work
through the dialogue with him. You’re
forced to become a waiter for Slug the Barman (love the hat!).
Talk to the sailors, who are sitting at
the table in the middle of the room.
Work through the dialogue with them.
One of the sailors is reviewing the bar, and finds fault with absolutely
everything. When you have their order,
go and talk to Barman again. Use the
following dialogue options.
- “Slug special” Birthday deal.
- Would you call a pickle food?
- I didn’t ask.
Go back to the sailors, talk to them, and work through all the
dialogue. You need to find pickles for
them. Go to the bar counter, and look at
the tray on the bar counter to see a close-up.
Pick up the BOWL from the
tray. Exit the close-up.
Notice the door behind the Barman, on
the right. Enter through the door behind
the Barman, into the Store Room.
STORE ROOM
Walk down a few steps. Look at the barrel on the right. This is where the pickles are stored. But they’re too slippery to grab with your bare
hands, so use the SCOOP with the barrel.
You see a close-up of the barrel.
The aim of this mini-game is to ‘catch’
6 pickles. Click on the brine water to
bring the pickles to the surface. Now
click on a pickle, and you’ll use your SCOOP to catch that pickle. When you have all 6 pickles, exit the
close-up.
Walk down, and leave the Store
Room.
SLUG’S BAR
Look at the tray on the bar counter, and
place the BOWL of pickles down on the tray. Now pick up the TRAY from the bar
counter, and give it to the sailors. One
of the sailors decides he wants to play darts.
Follow him over to the dartboard, talk to him, and work through all the
dialogue. Hmm, it seems you need some
money, if you want to play darts with him.
Talk to the Barman and demand your payment. The Barman places a single COIN on the
bar counter - take that COIN.
Return to the sailor at the dartboard, and give him the COIN. You see a close-up of the dartboard.
The aim is to end up with a score of
zero, and you have 2 rounds to do this.
Whoever has the lowest score, is the winner. The sailor will always win this game, so you
need to come up with a better solution.
You automatically exit the close-up.
The other sailor wants another round of
drinks. Talk to the Barman, and he’ll
start preparing another round for the sailors.
However, since there is no more pickles left, you have to find some FISH
instead. Take the CRAPS OIL from
the bar counter. Look at the tray on the
bar counter. Pick up the BOWL from
the tray. Exit the close-up.
Enter through the door behind the
Barman, into the Store Room.
STORE ROOM
Walk down a few steps. There’s some dried fish hanging from a rod,
in the back left corner of the Store Room.
Look at the dried fish to see a close up. Take the dried fish. Exit the close-up.
Leave the Store Room, and return to the
bar.
SLUG’S BAR
Look at the tray on the bar counter to
see a close-up.
Try to place the BOWL with fish
onto the tray on the bar counter, but the Barman tells you that he needs to
prepare the fish first. Exit the
close-up.
Look at the BOWL in your
Inventory.

Pour some CRAPS OIL onto the FISH. Exit the close-up.
Again, look at the tray on the bar
counter to see a close-up.
Place BOWL with the fish onto the
tray on the bar counter. Pick up the TRAY
from the counter.
Place the TRAY down on the
sailor’s table. As before, one of the
sailors goes to play some darts. Talk to
the Barman to demand your payment. Pick
up the COIN he leaves on the bar counter. Give COIN to the sailor playing darts,
so you can play him.
For this darts game, you need to get a
score of zero.
NOTE:
You can skip this darts mini-game by pressing Esc to access the Main
Menu, and choosing ‘Skip’.
It’s a tricky game, since the dartboard
keeps moving, but keep playing until you win.
The sailors are not very happy that you
won, and they return both your COINS.
Walk over to the Keeper, and pay her both COINS. Watch the cut scene, as you and the Keeper go
through to the Store Room.
STORE ROOM
Talk to the Keeper. She’s looking for The Bird, and you need to
help her find it. Look at the candle,
high up on the left wall.

You see a close-up of the candle. Pull the candle. Ah-ha!
The shelves on the back wall swing open.
Head through the shelves, into a Secret Room.
SECRET ROOM
Pick up the LAMP from the crate
in the middle of the room. Talk to the
Keeper and work through all the dialogue with her. When conversation is over, head right, over
the strange ‘bridge’, and up to the back section of the room.

There are 2 levers in the corner - pull
the left lever and watch the cut scene.
Pull the right lever - it’s stuck.
The Keeper gives you back your SPANNER, so use the SPANNER to
bash the stuck lever. Another door opens
on the right. Go through that door.
WATER WORLD
Work through the dialogue with the
Keeper. Try to pick up the lifebuoy, but
it won’t fit. Turn one of the valves
near the fish - it doesn‘t matter which one.

Talk to the Keeper again - she’ll move
the lower valves, and she wants you to do the opposite of her, on the valves
you looked at before. Look at the valves
at the top, and move them like so.
- Middle valve
- Right valve
- Left valve
- Middle valve
- Left valve
- Right valve
Together, you manage to open the water
hatch. Walk over to the Keeper, and
watch the cut scene. Now climb through
the water hatch.
~~~~~~~~~~~~~~~~~~~~~~~~~~~~~~~~~~~~~~
RENY
~~~~~~~~~~~~~~~~~~~~~~~~~~~~~~~~~~~~~~
BAR
You’re balancing on a beam, high up in
the bar. Walk forward a few steps, then
look at the COIN on the sailor’s table far below you. You need to find something to help you reach
the COIN. Follow the beam left,
until you’re above the Barman. Now walk
down the middle beam.

At the end of the beam, is a SCOOP hanging
below you. Take the SCOOP. Now retrace your steps, and follow the beam
right, until you’re above the sailor’s table.
Use SCOOP with the COIN on the table - you retrieve the COIN
without the sailor’s realising what happened. Watch the cut scene.
Follow the beam left again, until you’re
above the Barman. This time, go to the
very-left beam, and walk up a few steps.

Look at the ventilation shaft to see a
close-up.
Use COIN with the screws in the
ventilation shaft to open it. You automatically
crawl inside.
VENTILATION SHAFT
Crawl right, along the ventilation
shaft, and continue right, until you reach the airlock.
AIRLOCK
Look at the ladder - it leads up to a
hatch high above you, but the hatch is locked.
Look at the handles on the wall on the right, and then pull the handles
to see a close-up.
You need to pull all the handles, in
order to open the door. But it’s not
quite that simple - you need to pull the handles in the correct order, and you
need to time it, so that all the handles are down at the same time. If you number the handles like so.

Pull the handles like this.
- Handle 6
- Handle 4
- Handle 2
- Handle
5
- Handle 3
- Handle 1
If you’ve done it correctly, all the
lights on the handles will be green.
Back out of the close-up.
Climb up the ladder. The hatch at the top is now opened, so you
can get through now.
PROJECTION ROOM
You find yourself in a dark room with
lots of handles. It appears to be some
kind of projection room. You here a
voice in the darkness, calling for help.
Work through the dialogue with the voice. Oops!
It seems that the light was supposed to come on automatically whenever
the hatch was opened… but because you fiddled with the handles, the light won’t
come on now. Look at the large
projector, to see a close-up.
Push the red button in the
projector. Ahh, the projector gives off
some light, so you can see now. Walk
right, so you’re standing on the edge of the gap.
You can see now, that the voice in the
dark, is actually a talking bridge. Talk
to the bridge, who is hanging on for dear life on the other end of the
gap. Work through all the dialogue with
him. The poor thing is scared of
falling, and needs your help. Walk left
a few steps.
Look at the CABLE hanging from
the ceiling, and take the CABLE.

Walk back to the bridge, and use the CABLE
with the bridge. Now walk left a few
steps, so you can see the projector.
Pick up the CABLE from the ground. Watch the cut scene. Now work through all the dialogue with the
bridge. When you’re ready, simply cross
over the bridge, to the next platform.
There are 2 levers here, just like your
Grandpa saw earlier. Pull the top lever
to open the door. Now walk through the
door, into Water World.
WATER WORLD
Watch the cut scene. Look at the vending machine on the wall, next
to the door on the left, to see a close up.
Use your COIN with the coin slot
in the vending machine to get some FISH FOOD. Walk over to the edge of the water, and look
at the fishes. Give FISH FOOD to
the fishes, and watch the fish frenzy.
Look at the LIFEBUOY next to the water, and pick up the LIFEBUOY. Walk right a few steps, and climb down the
stairs into the water. Turn the winch in
front of the stairs, in the water. Watch
the cut scene. A cage rises out of the
water, and you keep the WINCH HANDLE.
Look at the cage to see a close-up.
Open the door of the cage, and take the KEY
from inside the cage. You
automatically exit the close-up.
Leave the water.
Walk left a few steps. Use the WINCH HANDLE with each of the
3 winches, near where the fishes are having their frenzy, to raise the 3
fishing nets. Now enter the water again. Swim up, then swim right, until you reach the
bars. Swim through the bars. Mema, that giant turtle, is here.

Use the controller on the wall, and Mema
will raise you up to the it.
This puzzle is rather tricky. The aim, is to turn all 3 coloured lights
off, by using your AMULET in
the 3 coloured sockets at the bottom. Your AMULET changes colour, depending
on what socket you’ve inserted it into.
Use the colour circle at the bottom left, for reference. This is how you do it.
NOTE:
After you insert the AMULET into any socket, you can skip this lights
mini-game by pressing Esc to access the Main Menu, and choosing ‘Skip’.
Turning
The Blue Light Off
- Insert amulet into the right socket
- Insert amulet into the middle socket
- Insert amulet into the middle socket
(again)
- Insert amulet into the right socket
- Insert amulet into the middle socket
- Insert amulet into the middle socket
(again)
- Insert amulet into the right socket
Turning
The Red Light Off
- Insert amulet into the middle socket
- Insert amulet into the left socket
Turning
The Yellow Light Off
- Insert amulet into the middle socket
- Insert amulet into the right socket
- Insert amulet into the middle socket
- Insert amulet into the right socket
- Insert amulet into the middle socket
- Insert amulet into the right socket
- Insert amulet into the middle socket
- Insert amulet into the right socket
Mema is free! Watch the cut scene with Mema, and work
through the dialogue with her. Soon,
Mema wants to swim underwater to meet with Mother, while you have to work your
way over the pipes.
PIPE SYSTEM
Jump up onto the nearest pipe. Work your way along the pipes, until you see
a crate floating in the water. Push the
crate along the water. Retrace your
steps, over the pipes, until you see the crate again. Push the crate along the water again. Keep pushing the crate, until it’s floating
next to Mema’s head. Now jump onto the
crate, then jump onto Mema’s head. Watch
the cut scene, as she takes you along the water as far as she can. You climb through a grate, into a
corridor.
YOUR FUTURE IS IN THE SKY
Mr Bunny is waiting for you here - it’s
good to be reunited with him. Talk to
him. he’s decided that he’s no longer
just a toy - he’s now an explorer!
~~~~~~~~~~~~~~~~~~~~~~~~~~~~~~~~~~~~~~
MR BUNNY
~~~~~~~~~~~~~~~~~~~~~~~~~~~~~~~~~~~~~~
OUTSIDE THE GATES
You’re now playing as Mr Bunny. This is what happened, when he went on his
little adventure.
Talk to Builder (the giant head), who
informs you that the Message is safe with him.
Open the hatch on the side of Builder’s head. When he rolls out his tongue, take RECORDER
from the tongue. Watch the cut
scene, as you return inside.
~~~~~~~~~~~~~~~~~~~~~~~~~~~~~~~~~~~~~~
RENY
~~~~~~~~~~~~~~~~~~~~~~~~~~~~~~~~~~~~~~
YOUR FUTURE IS IN THE SKY
Mr Bunny gives you the RECORDER. Look at the RECORDER in your Inventory
- Builder’s mind is in there. You’ll
have to tell Grandpa, when you find him.
Enter the lift on the right.
LIFT
Try to pull the handle - nothing
happens. Look at the lock panel to see a
close-up.
The panel shows a sequence of 8
diagrams, and you have to correctly guess the 9th diagram from the
buttons at the bottom. You have to do
this 3 times. When you guess correctly,
a light at the top turns green. Select
the following buttons.


Watch the cut scene, as you ride up the
lift.
PATH
Walk up a few steps, and go through the
door on the left, into the Fortune Teller’s Room.
FORTUNE TELLER’S ROOM
Look at the Fortune Teller. Try to talk to the Fortune Teller, but she
just ignores you. Use the ladder behind
her, and climb up the ladder.
From this angle, you can see a lock in
the Fortune Teller’s back. Use your KEY
in the lock in the Fortune Teller to activate her. She turns around.
Talk to the Fortune Teller again, and
this time, she responds. Work through
the dialogue with her. It turns out that
this Fortune Teller is Mema’s mum. You
bravely give her your right hand, in order to help her end the Eye’s power over
Kapia. However, she’s still not much
good without her Receiver, and she wants you to find it for her - it should be
somewhere in the church. When
conversation is over, look at the ladder next to her, to see a close-up.
Take the STEP from the
ladder. You automatically exit the
close-up.
Walk down a few steps, and look at the
ladder on the left to see a close-up.
Use STEP with the ladder, then
use the ladder to climb up to the roof.
ROOF
Look at the red cart, and use the
cart. The Fortune Teller pulls you
across the gap, and over to the stained glass window.
~~~~~~~~~~~~~~~~~~~~~~~~~~~~~~~~~~~~~~
STEFAN
~~~~~~~~~~~~~~~~~~~~~~~~~~~~~~~~~~~~~~
CHURCH
Head right, and follow the path along to
the ONIX followers sitting in the pews.
Walk over to the Keeper, and watch the cut scene. Work through all the dialogue with the organ
player. Watch the cut scene.
~~~~~~~~~~~~~~~~~~~~~~~~~~~~~~~~~~~~~~
RENY
~~~~~~~~~~~~~~~~~~~~~~~~~~~~~~~~~~~~~~
CHURCH
You climb through the stained glass
window, into the church. Walk right a
few steps, and look at the crystal ball in the book shelves. It looks like Mother’s Receiver. Pity you can’t reach it. Walk right a few steps, to the alcove
area.
Pick up an APPLE from the bag of
apples on the floor.

Look at the pillow on the ground. Look at the letter on the pew, to see a
close-up.
‘I Am In Control’. Strange letter! Exit the close-up.
Look at the terminal on the table, and
look at the printer on the table. Leave
the alcove area.
Continue right, until you reach the red
pipes. You see Stefan, your grandfather,
far below.
Drop the APPLE onto Stefan to get
his attention.
~~~~~~~~~~~~~~~~~~~~~~~~~~~~~~~~~~~~~~
STEFAN
~~~~~~~~~~~~~~~~~~~~~~~~~~~~~~~~~~~~~~
CHURCH
You see Reny high above, and you realise
that you have to buy her some time. Work
through the dialogue with the organ player.
Wait… he is being controlled by the Eye!
That can’t be good! Watch the cut
scene.
~~~~~~~~~~~~~~~~~~~~~~~~~~~~~~~~~~~~~~
RENY
~~~~~~~~~~~~~~~~~~~~~~~~~~~~~~~~~~~~~~
CHURCH
You don’t know if your grandfather saw
you, but you can’t risk throwing another apple.
You’ll have to do everything on your own. Head right, and continue right, until you
reach the stairs. You can’t climb down
the stairs, cos someone will see you.
Pick up the MOP that’s lying on the ground next to the
stairs. Now head right again, until you
see the Receiver ball in the book shelves.
Enter the alcove area on the right.
Tap ‘Back’ at the bottom right,
to place the MOP down on the ground.
Pick up the PILLOW from the ground. Use PILLOW with the Receiver ball in
the book shelves to place it down on the ground, thus creating a soft place for
the Receiver ball to land. But it’s not
quite soft enough yet - you need another pillow. Walk right a few steps, and take PILLOW from
the bench in the alcove area. Again, use
this PILLOW with the Receiver ball in the book shelves to place it down
on the ground. Now go back to the alcove
area, and retrieve the MOP from the ground. Use the MOP with the Receiver ball in
the book shelves to knock it down.
Now you have the Receiver BALL,
you need to find a holder for it. Still
in the alcove area, walk right a few steps, and place the Receiver BALL into
the ball holder.

Now look at the Terminal on the table,
next to the ball holder.
Open the Memories folder in the
Terminal, and read the following files.
- The Childhood
- The War
- The Eye
- The Onix
Read all the information in the Memories
folder. When you’re ready, back out of
the Memories folder.
Open the Mother folder in the
Terminal. Click through the virtual
conversation between you and Mother. Now
work through the dialogue options to learn about the fire birds. When you’re ready, back out of the Mother
folder.
A new folder has appeared in the
Terminal. Open the Birds folder, and
notice the different buttons. Mother
gave you clues for releasing the fire birds, so press the buttons in this
order.
- Opens up the cage
- Leave the cage
- Find an open flame
- Hang in the air
- Print
The printer prints out a PUNCHED CARD. Back out of the folders, and exit the
Terminal. Walk over to the nearby
printer, and pick up the PUNCHED CARD from the printer. Also, take the HANDLE from the
printer. Exit the close-up. Leave the alcove area.
Head left, and continue left, until you
see the cage.
Look at the cage to see a close-up.
Look at the 2 buttons on either end of
the cage, above the red and green lights.
In order to open the lock, you must press both buttons at the same
time. Unfortunately, you gave one of
your hands to the Fortune Teller, so you only have one hand left. Use the HANDLE with one of the buttons
- the HANDLE is just the right length to press both buttons
simultaneously. Now insert PUNCHED
CARD into the cage mechanism. Watch
the cut scene with the fire birds.
That’s the first step in defeating the
evil Eye - the organ player is now blind.
Next, you need to place a message container under the beating
heart. Head right, and continue right,
until you see the top of the stairs.
Climb down the stairs, to the Ground
Floor.
Follow the path to the left of the
stairs, and continue along until you reach the organ player. Creep over to the organ, and use the RECORDER
with the organ. You’re almost there…
but the organ player catches you.
~~~~~~~~~~~~~~~~~~~~~~~~~~~~~~~~~~~~~~
STEFAN
~~~~~~~~~~~~~~~~~~~~~~~~~~~~~~~~~~~~~~
CHURCH
You see Abie \ the organ player grab
your beloved granddaughter Reny, and you want to save her. Push Abie \ the organ player away from
Reny. Watch the cut scene.
~~~~~~~~~~~~~~~~~~~~~~~~~~~~~~~~~~~~~~
RENY
~~~~~~~~~~~~~~~~~~~~~~~~~~~~~~~~~~~~~~
CHURCH
Pick up the RECORDER from the
floor, and insert it into the organ.
Watch the cut scene. You
automatically climb back up the stairs to the 1st Floor, so you can
deactivate the security lock.
Head down, and follow the path, until
you reach the 1st pipe.

Open the pipe, and watch it connect to
the pipe above. Continue left along the
path, until you reach the 2nd pipe.
Again, open the pipe, and watch it connect to the pipe above.
Now sit back, and enjoy the final cut
scene, as everyone gathers to decide their fate. Will you all remain on Kapia, safe, but
little more than slaves under the ruthless Eye?
Or will you evacuate Kapia, and start again on a new planet, so you can
be free? The majority choose to
evacuate… and freedom!
The End!
No comments:
Post a Comment